• Blog
  • Our Wedding
  • Driving from California to Alaska
  • About
  • Contact
Menu

Have Dog, Will Drive

Street Address
City, State, Zip
Phone Number
A Southern California Camping & Lifestyle Blog

Your Custom Text Here

Have Dog, Will Drive

  • Blog
  • Our Wedding
  • Driving from California to Alaska
  • About
  • Contact

How to Save Your Wedding Cake Top Tier for Your First Anniversary

September 26, 2019 Elizabeth Baldridge
Wedding_Top_Tier.jpg

One of my favorite things about our first wedding anniversary last month (in addition to our incredible Ojai trip) was eating the top tier of our wedding cake! If you haven’t heard of this tradition, it’s considered good luck to freeze the top tier of your wedding cake (only serving the lower, larger tiers to your guests) and then eat it—or at least some of it—on your first wedding anniversary.

I personally really dislike the taste of freezer-burned food, so I was pretty unsure how this would turn out. Would it even be edible after a whole 365 days in the back of our freezer? Somewhat unexpectedly, it turned out DELICIOUS! I was so happy with it that I wanted to quickly share how it worked in case it helps anyone else who wants to try this tradition.

Preserved_Wedding_Cake.JPG

The way I froze it: I placed the top tier (which our caterers wrapped up for us the night of our wedding, and Grace’s brother (and best man) carried back to his hotel refrigerator) into a large straight-sided bowl, and then fitted a large ziplock bag around the whole thing. Then I put rubber bands around the opening of the bag so that no air could get through. It was sort of a random way of packaging it, but it was the only way I could think of to cover the entire cake! The food storage containers I have just aren’t big enough, and I needed something solid and airtight. You could also purchase a large airtight container, I just didn’t think of this in advance.

The way I defrosted it: I think the method of defrosting is probably just as important as the method of freezing. I consulted my best friend on this, who happens to have gone to culinary school :) As Grace and I headed out the door to our anniversary weekend trip, I took the cake from the freezer (still in the container I mentioned above) and put it in the refrigerator. Then it had about 48 hours to slowly come to a cold, but not frozen, temperature. I think this gentle defrosting really helped preserve texture and flavor. When we got home from our trip on the afternoon of our actual anniversary, I took the cake from the refrigerator, removed the packaging around it, and placed it on a cake stand on the counter. Then it had a couple more hours to come to room temperature.

It turned out better than I ever would have expected! I honestly couldn’t tell it had been frozen for a whole year. I went into it thinking we’d just eat a couple of bites for good luck. As it turns out, we ate the entire thing over the next few days! Our top tier was a coconut-pineapple flavor, which reminded us both of our wedding and our honeymoon in Hawaii. I kept the cake in the fridge, covered, when I didn’t have it out to cut slices.

The way I styled it: Just to make it extra special, I decided to buy some small pink tulips and arrange them around the cake. I love small things like that :) Definitely not necessary, but it also was reminiscent of our wedding since our florist had styled our cake with our wedding flowers. Here’s how it looked that night:

Wedding_Day_Cake.jpg

Hard to believe that top tier is the very same one we ate last month. I also served it on a cake stand we received as a wedding gift from a family friend, so that made it extra special too!

Wedding_Cake_Anniversary.jpg

I hope this post gives you some tips if you want to try out this tradition! If you didn’t or don’t want to save your top tier, I also think a nice tradition would be to get cupcakes in your wedding cake flavor from your baker! Grace and I plan on doing that in anniversaries to come! Our other flavors were red velvet (bottom tier) and carrot cake (middle tier). YUM!

In How-To, Our Wedding
1 Comment

My Morning Routine

April 22, 2019 Elizabeth Baldridge
Willie_Kisses.JPG

Depending on how closely you follow this blog/my Instagram, you might have noticed that in the past six months I’ve started working primarily from home. I still go into the office once or twice a week, which I appreciate the ability to do, but my job allows me to work remotely and I truly believe ALL aspects of my life are so much better for it. I have been thinking about doing an updated version of my day in the life post from last year to show what an average day is like working from home, but in the meantime, here’s a glimpse of what my morning routine looks like!

Is it just me, or is 2019 the year of really caring about morning/evening routines? I have read a few other blog posts about morning routines and how important it is to have a set rhythm and I find them fascinating.

I have finally gotten into a consistent routine and to a place in my life where I can appreciate taking mornings slowly rather than rushing to get to work. The other day, I decided to boil it down to a science and make a list in my phone of the basic steps:

(WFH stands for work from home, if you were wondering. I have a slightly different routine on days I go into the office).

(WFH stands for work from home, if you were wondering. I have a slightly different routine on days I go into the office).

One of my April goals was to actually wake up with my first alarm instead of hitting snooze a few times. That said, I often don’t set an alarm! I know that might sound totally crazy to people. But I probably only set an alarm 2 or 3 days a week, when I really need to make sure I wake up at a specific time. The reason? The dogs will make sure I’m awake at a certain point anyway :) Between the two of them there is literally no way I will sleep past 7:30 or so. And most days I naturally wake up before that. On the rare occasion I need to wake up at 6am or something, I’ll set an alarm.

The first thing I do when I get up in the morning is take care of Bean. Usually Bean and I get up first, and Grace and Willie sleep in a little later. But actually on this particular morning, Grace and Willie wanted to wake up with us so we all went on a walk together.

But first, I put on dog-walking clothes (aka sweats) and mix Bean’s food. Bean’s food is raw dehydrated dog food so I mix it with warm water and let it sit while we’re on our morning walk.

Bean_Food_Mix.JPG

I love how bright it is in the morning at this time of year. It definitely makes our a.m. dog walks nicer!

Boys_Walk.JPG

After our walk (we only do about a 10-15 minute walk in the mornings), I come back in and feed Bean his re-hydrated food. He LOVES it! Willie gets fed too of course, but normally Grace handles that so it’s not really part of “my” morning routine.

Then I go around and turn on everything I need in the mornings. I press start on the coffee maker (I grind the beans and set up the water and everything the night before).

Coffee_Machine_Start.JPG

And I also turn on my essential oil diffuser to diffuse for three hours. Lately I have been adding drops of lavender and grapefruit essential oils for the morning, and then sometimes at night I’ll diffuse just lavender.

Oil_Diffusing.JPG
Lavender_Grapefruit.JPG

I also usually start a load of laundry in the morning. Here’ s a little homemaker-y tip for you: do laundry every day or every other day! This has been AMAZING for me once I realized how great it is. We have one of those washing machines that automatically senses how much water to use, so it might not be the most eco-friendly choice if your washer doesn’t do that, but it’s life changing in terms of household management. With two people and two dogs, we definitely have enough laundry every 2 days to do a small load, and it just makes it so I’m never stressed out doing 4 loads of laundry on a Sunday night. I start the laundry machine in the morning, change over to the dryer when I get up to refill my water or get a second cup of coffee, and fold the laundry at lunch. It’s so easy and is the best!!

Start_Laundry.JPG

Next up: freshening up and getting ready for the day. Here’s a fun fact about me, I only use coconut oil to “wash” my face. In the past six months I’ve only let soap or any kind of face wash touch my face maybe 5-6 times total.

Coconut_Oil_Wash.JPG

And my skin in sooo happy about it! My skin is far from perfect, but this is an amazing solution for me right now. First I splash my face with warm water. Then I take a wash cloth soaked in hot water, squeeze the water out, and smooth a small amount (maybe 1/2 a tablespoon) of coconut oil all over my face. Then I take the hot washcloth and slightly exfoliate/steam my face with it. I do this at night too, coconut oil is the best makeup remover! Kind of like not setting an alarm, this might seem very crazy to some people. But I love it :)

After my coconut oil routine (and brushing my teeth), I put on makeup. Putting on makeup is one of those things that makes me feel productive and polished even though I’m working from home. On days I skip it, I just don’t feel as fresh. Here’s a pic of me with half my face with makeup (the left half below), and the other half none (the right half below), to give you an idea. It’s pretty basic/simple for days I’m working from home.

Half_Makeup.JPG

Also, how cute is my little necklace? My best friend Tina gave it to me right before my wedding. It has our wedding date in roman numerals, I love it so much.

Another important thing to me when I work from home: I HAVE to put on actual clothes. I still keep it comfy, and way more casual than if I were going into the office, but it cannot be PJs or I’ll feel sluggish all day. On this day, I opted for a soft comfy striped dress with a thin black pullover on top.

Comfy_Work_Outfit.JPG

After I’m dressed I make some breakfast and drink coffee. A year ago, I would have thought that was so strange-I was not a coffee drinker at all. But it’s such a love language for Grace that I’ve gotten into it. A game changer for me has been putting butter in my coffee. I think I thought the butter coffee trend was just that-a trend-but I tried it and am totally sold. I like the taste and it helps my body process the coffee 100% better. I don’t get jittery. The extra fat is a good thing in the morning! (If you have no idea what I’m talking about, there are a bunch of articles about the benefits of putting butter in coffee, like this one).

I just put a little pat of butter in the bottom of my coffee cup and then pour the hot coffee over it so it melts.

Butter_In_Coffee.JPG

I also usually have some Greek yogurt and toast in the morning.

Morning_Toast.JPG

Sidenote - I’ve always loved the little vintage-y painted fruit tiles in our kitchen and it just really sunk in that some of them are lemons (like in the pic above) which is so perfect for our little house! You can read all about my love for my lemon tree here.

Simple_Breakfast.JPG

This is the best part of my morning routine-sitting, eating breakfast and drinking butter coffee, and getting kisses from Willie (who really wants a piece of the bread). See the picture at the top of this post, haha.

I also have some quiet time reading and journaling before really starting my day.

Morning_Reading_Journaling.JPG

At this point I feel ready to take on the day! I head into my little home office where my office dog (Bean) is waiting for me. Grace and I joke that he “clocks in” to work because he’s always waiting for me under my desk and it’s the cutest, most loyal thing. I love little Beanie so much!

Desk_Work_Time.JPG

Do you have a set morning routine?

In Personal, How-To
1 Comment

Favorite Podcasts for Road Trips

April 20, 2018 Elizabeth Baldridge
Podcasts_Driving

I don't know why, but it look me a LONG time to get behind the idea of listening to podcasts in the car (or at all). It just was not appealing to me for a while. I had heard that there were all these great podcasts out there, and people seemed to really like them, but I felt like I would be bored.

Well, I finally opened my mind to this awesome medium a few years ago (mostly through Grace intentionally choosing podcasts for our drives), and today I want to share what some of our favorite podcasts have been for road trips! In my experience the best podcast recommendations have been through blogs or word-of-mouth, so I hope you find something new that you enjoy listening to. If you have suggestions you think Grace and I would like, I'd also love to hear them!

Here are some that we've gotten really into:

Generation Why - the two hosts get together and discuss a case or mystery each episode. They usually discuss famous/infamous murders, but they also discuss mysteries like the Titanic conspiracy theory (that they totally debunk), Princess Diana's death, and others. This is one of the few murder mystery podcasts Grace will listen to (because she wants to avoid parallel thinking for her show Murder with Friends), because it's a different-enough concept. That said, if you like her show, I'm sure you will love Generation Why.

Young House Love - actually, this is one that I'm just into on my own (I haven't had Grace listen to it but it's more my style than hers). It's a married couple who are somewhat of experts in home decor and renovations, and each episode they discuss common questions and new ideas related to those concepts. I was skeptical when I heard about this podcast--how can a non-visual medium deal with design and decor in an interesting way? But trust me, they really do! If you're at all interested in DIY, home decorating, etc., check out Young House Love.

Serial - this one kind of goes without saying, as it really revamped the whole podcast genre and was incredibly popular. I'm guessing you've already listened to it. If you haven't, this is a great introductions to podcasts and will convince you of how riveting they can be. Note: I tried listening to Season 2 and didn't like it, I'm sorry to say.

S-Town - initially along the same lines as Serial (same producers, I believe), S-Town is a captivating and wildly fascinating podcast. It's the first podcast Grace and I listened to on our Alaska trip, and we were both completely engrossed for hours. I will say, without giving anything away, the themes and topics were VERY different from what I was expecting, and very different from Serial. I promise, this one is worth listening to.

Criminal - this podcast has one of my favorite narrators, Phoebe Judge. Just love her voice. She discusses different crimes and a whole variety of things that somehow involve criminal justice (the theme is very broad). Every now and then there's an episode that's a miss for me, but most are hits. They're pretty short episodes, which is nice if you just have an average-length commute and want to hear a good story.

You Must Remember This - one of Grace's all-time favorites. It discusses the secrets and forgotten histories of Hollywood's first century. Grace is an old Hollywood fan and knows all the old movie stars' names, which I think most people have forgotten (which is kind of the theme You Must Remember This explores). If you are interested in old Hollywood, this is a great podcast.

In the Dark - Grace and I each (separately, on our commutes) recently listened to this podcast, and we agreed it was one of the most riveting we'd listened to in a long time--for us, up there with Serial and other "greats". It's been out for a couple of years, but I hadn't heard of it until recently. The subject matter is dark (as the name might suggest), but it's incredibly compelling and highlights an important area of criminal justice/social policy from a perspective I had never thought about. Season two (about a different case) is coming out next week, and I'm looking forward to listening.

Heaven's Gate - we listened to this podcast last weekend on our drive to Jamul (check out my recap of that trip here). Sometimes the narrator was a little cheesy or overly dramatic, but the basic topic (the Heaven's Gate cult and the mass suicide in San Diego) is SO interesting. I didn't know much at all about the cult, so I was hooked on this podcast and learned a lot about a strange little slice of history.

Honorable Mentions - these are a few that I wasn't glued to, but definitely still entertained us on our long Alaska drives (and I'm sure they're exactly someone else's cup of tea):

Up & Vanished - this podcast is about the disappearance of Georgia beauty queen Tara Grinstead. The story is horrifying and compelling, but the narrator just wasn't my favorite. We didn't end up listening to the end of this one. I also felt like there were entire episodes that didn't go anywhere and could have been cut out of the series. That said, if you have a particular interest in this case, the podcast goes really in-depth about it.

Someone Knows Something - kind of the same issue; slow podcast, not my favorite narrator. But again, very interesting case, and took place in Canada, where we were traveling at the time.

Missing & Murdered - we listened to this because it deals with Alberta Williams, who (it is suspected) was murdered on the "Highway of Tears." We drove the Highway of Tears (a highway in rural British Columbia where a high rate of women have gone missing and/or been murdered) for a couple of days on our Alaska trip, and--I have no idea why--we thought it would be "fun" to listen to a podcast about it. Well, we didn't get up getting scared, which goes to show you the podcast was a little dry. Side note - you can find out more about the Highway of Tears here. We felt perfectly safe our whole drive.

Happy podcast listening!

In Personal, How-To
4 Comments

How to Throw a Surprise Party

January 23, 2018 Elizabeth Baldridge
Surprise_Balloons

As you might have seen on my Instagram stories, this past weekend Grace and I threw a surprise party for our best friend Tina! This was my first time throwing a surprise party for anyone, so I'm by no means an expert. But, I was really happy with how it went, so I thought I'd share some tips from what I learned! A really sweet suggestion I got from my Survey a few weeks ago was to share some posts on hospitality, decorating, etc. That inspired me to write this post!

Surprise_Party_Group

That's Tina in the middle. Grace has known her since college, and I met Tina when I moved to California a few years ago. Tina is also our neighbor in West Hollywood! We go over to her apartment at least once a week (to watch the Bachelor), and sometimes twice a week if Drag Race is on. She's one of the most loyal people around and we just love her! A couple of months ago we were talking about Tina's birthday (Grace and I get REALLY excited about friends' birthdays and often discuss them months in advance, haha), and for some reason, the idea to throw a surprise party popped into our head. We've always wanted to throw one because they're so fun. But it's really hard to keep the person from suspecting something. We realized Tina would probably not expect us to throw her a surprise party, so it was the perfect cover.

With that in mind, my first tip for throwing a surprise party is to pick a time, occasion, or person that is low key/unassuming. I feel like surprise parties can be stressful when they're on the person's actual birthday, and you have to convince them that no one could hang out or that everyone forgot their birthday. To me, that kind of ruins the fun and celebration. So in this case, we actually had Tina's surprise party a week before her actual birthday to throw her off. I also think a surprise party could be really fun for a non-birthday occasion, like a bridal shower, congrats party, going away party, etc. I think it's a lot less suspicious for those types of occasions.

My next tip is to keep it simple. Our plan was to take Tina out to dinner at La Boheme in West Hollywood (SO good!), and at dinner casually mention that I had baked a dessert back at our house (we all live really close together so it makes sense to just stop by our house on the way home to drop her off). Key to all of this was to pick Tina up, so at that point we had her captive until we brought her to the party, haha! Again, it made sense because we told Tina we wanted to drive so she could kick back and have some drinks at dinner. We tried to keep everything within the realm of what seemed logical, so we didn't tip her off that something was going on.

Also in terms of keeping it simple, we went really basic with the decorations, food, and drinks. Planning a surprise party has enough complicated elements as it is! Because we were taking Tina out to dinner ahead of time, we just had a few store-bought snacks at our house for the party. We also got a cake decorated with a RuPaul phrase (Tina, Grace and I watch a lot of RuPaul together).

Sissy_That_Walk_Cake

For decorations, we went to Vine-American Party Store in our neighborhood (I've used them a bunch of times for balloons and they're great). We picked out some things we thought were festive and/or went along with Tina's interests. For instance, she loves Disney and she's Italian, so we got some themed decorations along those lines. Pretty kitschy but fun :)

Speaking of keeping it simple--we actually recycled this birthday banner! Grace ordered it on Etsy last year for my birthday party. I have a drawer in our bar area with all kinds of party decor (I have birthday banners, Happy New Year banners, rainb…

Speaking of keeping it simple--we actually recycled this birthday banner! Grace ordered it on Etsy last year for my birthday party. I have a drawer in our bar area with all kinds of party decor (I have birthday banners, Happy New Year banners, rainbow Pride banners . . .) it makes things really easy when it comes time to throw a party. And I'm always adding to my collection!

In case you can't tell, these are Minnie Mouse party decorations.

In case you can't tell, these are Minnie Mouse party decorations.

I loved how pretty the Chrome balloons turned out.

I loved how pretty the Chrome balloons turned out.

Italy_Decor

Last "keeping it simple" tip: don't feel like you have to buy every type of alcohol under the sun (if you're choosing to serve alcohol at the surprise party). In my experience, if people are really particular about what type of alcohol they'll drink, they will just bring their own! For this party, serving about 15-20 people, we bought: a case of beer (24), a bottle of vodka (could also use gin), a bottle of bourbon, a couple bottles of champagne, some flavored La Croix, grapefruit juice, and tonic. That amount was plenty, and everyone seemed happy!

Another thing that really helped us have a successful surprise was recruiting friends to be the "point people" for coordinating the surprise. We asked a few friends to come over about 30 minutes earlier than everyone else, and we left a key for them and told everyone else to text them with questions. That way, while we were at dinner with Tina I wasn't stressing about whether people were arriving okay. I knew our point people had it covered!

Surprise_Supplies

Seen in the picture above, before we left we set out a bunch of party hats, noisemakers, fun glasses, etc. I think it makes the surprise feel extra festive.

For the actual surprise, we decided to leave it up to our friends what they thought would be easiest and most effective. They ended up hiding off to the side in a nook off of our dining room, and then when we walked through the door, they jumped out and surprised Tina. I texted the point people when we were parking the car so they could get ready. When we walked in, they actually waited a beat before jumping out, and then they all broke into song for "Happy Birthday" (much to the embarrassment of Tina). It was SUCH a fun moment to fully pull off the surprise, plus to see a bunch of our friends all at once! 

Tina_Surprise

For the rest of the night we mostly just hung out, caught up with friends, and celebrated Tina! Tina is very beloved, so it was awesome to see so many people from various facets of our friend group all come together. 

And, it wouldn't be a Have Dog, Will Drive post without a mention of our fur babies, who were very much present at the party:

My brother got to meet Bean for the first time!

My brother got to meet Bean for the first time!

This picture is so funny to me. Parties seem to make Willie tired, and he usually retreats to his bed partway through. This time, he hopped right up into our bed, and of course some of our dog-loving friends were not far behind. 

This picture is so funny to me. Parties seem to make Willie tired, and he usually retreats to his bed partway through. This time, he hopped right up into our bed, and of course some of our dog-loving friends were not far behind. 

I hope you enjoyed reading about our first surprise party! This was also our first party in our house (we've had a dinner party but not a bigger group like this), and it makes me so excited for lots more.

In Celebrations, How-To Tags surprise party, West Hollywood
6 Comments

How to Stay in a Hotel with a Dog

November 3, 2017 Elizabeth Baldridge
Ojai_Valley_Inn_Dog

I recently got a blog post request from my sweet cousin Amanda, who has a pup of her own. She asked for tips on finding hotels that accept dogs and how to have a successful hotel stay with your dog. I've gotten questions along these lines for awhile now, so I figured it would be a great time to write a post. As always, if you have other questions, feel free to Contact me!

In my experience, it's totally possible to have a great stay in a hotel with a dog. Some of the places we've stayed (or have upcoming reservations to stay) with dogs in California are the Ojai Valley Inn & Spa, the Ace Hotel & Swim Club in Palm Springs (staying this December), and a certain resort that shall not be named because it's a surprise for Grace's birthday in two weeks--blog post to follow. Out of California, we've also loved the Opus Hotel in Vancouver, Bell II Lodge in rural British Columbia, and the Coast High Country Inn in Whitehorse, Yukon. I'd say we've generally stayed in more vacation rentals/camping or glamping setups than hotels, but hotels are a great option for many reasons, and I hope to give you some tips that will make it easier to stay there with your fur baby.

Whitehorse_Dog_Hotel

The first thing I will say about finding dog-friendly hotels is just to not automatically assume that hotels don't take dogs. I'm always really (pleasantly) surprised at all of the hotels that will accept them, including high end places like the Four Season and the Ritz-Carlton. Not that I'm often staying in places like that, but I notice in my research that they allow pups! Toward the other end of the spectrum, Best Westerns are awesome for doggy road trips. They are super pet friendly across the board (and affordable), and we had some very comfortable stays in Best Westerns during our Alaska trip with Willie.

And, keep an open mind for anything in-between. Bed & Breakfasts (I mean traditional Bed & Breakfasts, not necessarily Airbnbs) are sometimes great for dogs.

Now you might be thinking, how can you find out if a hotel takes dogs? I have found that you can almost always tell online--but it can't hurt to call if you have questions. Here are some tips for locating dog friendly places:

  • I like to search TripAdvisor for my preferred location, dates, and click their pet-friendly filter. It will show you on a map (much like an Airbnb search) all of the available hotels for your dates and that accept pets. If you're flexible on the exact location (say you want to take a road trip within 3 hours but are open to different destinations), you can drag and move the map on TripAdvisor and more hotels with your parameters will pop up! I do recommend double checking on the hotel's website, however, because sometimes TripAdvisor is inaccurate or out of date on whether hotels are dog friendly. Another tip here is to search within TripAdvisor reviews (there's a search bar at the top of the reviews) for the word "dog." This will bring up all the reviews of people who have mentioned dogs, and it's often really helpful to find out what it's like to bring a dog there.
  • Another nice aggregating website is Bring Fido. You can search specifically for pet-friendly hotels and activities, and the site has reviews geared toward people who are bringing dogs on their trips.
  • On hotel websites themselves, it can actually be tricky to find out whether they are dog friendly. I think a lot of hotels don't like to advertise loudly that they accept dogs, because they don't want to deter people who aren't traveling with a pet or don't like dogs. In my experience, you can usually find it under the amenities tab or the FAQ section, if they have one. If all else fails, try googling the name of the hotel + "pet friendly." This will often bring you to a dog-related landing page on the hotel's website that can't be found through internal site navigation. And of course, you can always call the hotel directly.
  • One thing to be aware of is breed and size restrictions. Sadly, there are some awesome-looking properties that won't accept dogs over 25 pounds or so, or they don't accept pit bulls/rottweilers/dobermans/etc. I understand, and it's their business and their prerogative--but thankfully, many other places are open to well-behaved dogs of all shapes and sizes. 
  • Finally, be sure to actually book a pet friendly room. If you see that a hotel takes dogs, you often can't just book any room in the hotel and have your dog with you. Hotels generally have specific (and limited in number) pet-friendly rooms, so either select "Dog Friendly" when booking online, or if you don't see that option, call directly to book. There is usually a pet fee, so be aware of that too. The steepest I've seen is $150 at Ojai Valley Inn and Spa; often it's more like $25-50 extra. Usually if you're paying closer to $100 or more, the fee includes some sort of toy, commemorative water bowl you get to take home, etc.

Once you have your pet-friendly hotel reservation, there are a few things to keep in mind to make sure your stay is restful. Below are a few things I've learned throughout the years of bringing dogs to hotels:

  • Know your dog and what his or her comforts are. If you usually crate your dog, bring the crate to the hotel, too. When you book your room, it's probably worth checking whether you will be allowed to leave your dog unattended in the room. In my experience, most will allow this, but they'll often want to know that the dog is unattended and have you leave a phone number with the front desk in case the dog is barking. With that in mind, if you have a major barker, a hotel might not be the best option for you. If you do want to stay at a hotel, consider a property that offers detached cabins or villas so that you don't receive complaints from neighboring rooms.
  • We have left Willie and Casper in hotel rooms by themselves, but never for long--usually just while we go to dinner. If we're out exploring, we prefer to just bring our dog with us. It's probably a good idea to leave your pet alone for a lot less time than you normally might at home. Remember that it's a new and potentially confusing experience and place for them. Also, depending on the quality of the hotel, the concierge might be able to recommend pet-friendly activities in town with your dog. If you're bringing a dog, I think it's the most fun to include him or her in everything! The one exception tends to be meals if you have to go out to eat and your only option is sitting indoors. Grace and I often like to treat ourselves to room service for this reason--more time with sweet Willie :)
  • Be sure to pack their regular food and feed them at normal times. Dog friendly hotels will often have treat stations in the lobby (we saw this recently at the Hilton San Francisco Bayfront where we stayed for a wedding, and it was super cute and thoughtful), but be careful about introducing a lot of strange foods in a new place. Some hotels even have doggy room service menus, but I personally would avoid it--your dog will be happier with his or her normal food, even if it seems like a novelty to order something special. Having an upset stomach in a hotel seems like a recipe for disaster for a pup.
  • Lastly, consider (or call to ask about) the layout of the hotel when booking. Keep in mind your dog's special needs, if any. For example, with Casper, going through a crowded lobby would be stressful, especially if there were other dogs around. So hotels like the Ojai Valley Inn and Spa, which are casita-style and have separate entrances for each room, were far preferable for him. Willie doesn't mind a lobby; in fact he loves getting all the attention from strangers he usually receives when people see a dog in a hotel. One nice thing we've noticed about Best Westerns is that the dog-friendly rooms open directly onto a grassy space through the back door--such a smart idea. If you're nervous about getting your dog through a crowded lobby, make sure to ask about the setup. We've stayed in hotels where the dog friendly rooms were on the 10th floor through a winding lobby and huge elevator bay. Not ideal, but good to know about in advance.

I hope this overview about staying with dogs in hotels has been helpful! If your dog is quiet and well-behaved, staying in a hotel can be a really fun experience. My two biggest takeaways for this post are to keep an open mind about what hotels and properties might accept pets, and bring as much of your dog's comfort items as possible (beds, toys, favorite treats) so that they know they are in a safe and comfortable place.

Happy travels! If you have any favorite pet friendly hotels, I'd love to hear about them and maybe visit them one day!

Opus_Hotel_Dog_Friendly
In How-To Tags hotels, dogs in hotels, advice, doggy road trips
Comment

Road Trip Capsule Wardrobe + Gear

August 28, 2017 Elizabeth Baldridge
This post is the third in a series about preparing for our road trip to Alaska and back. I wrote about planning the trip here and budgeting for it here.

This post is the third in a series about preparing for our road trip to Alaska and back. I wrote about planning the trip here and budgeting for it here.

Do you want to know a little secret that shows just how neurotically excited I am for this trip to start? I'm already packed. Yep, my bags are even zipped up and sitting under my bed, ready to go. I have memories of trying to fit everything into my suitcase the night before leaving to study abroad in college, crying, stressed, and having BAD pre-travel jitters. For this trip, I wanted things to be different! While I still sometimes have a nagging feeling that I could be forgetting something important, for the most part I feel good about what I've decided to bring.

A few months ago, Grace had to sit me down for a little chat. We weren't going to be bringing large suitcases on this trip, she gently told me. 3 pairs of shoes each would be the maximum. I guess she has this idea that I'm an overpacker. No idea why she thinks that . . .

Moving on. After Grace broke the news, I started thinking right away about bringing a capsule wardrobe instead of trying to come up with specific outfits for the trip. I had read blogs about using capsule wardrobes for travel (and even just day-to-day life), and the idea really appealed to me. If you aren't familiar, this is the gist of a capsule wardrobe: you pick a relatively small number of clothing items (for a vacation, let's say 12) that are all part of the same color scheme and can be mixed and matched. Each item must go with all of the other items. You can't have a crazy shirt that only matches one of your pairs of pants. Even accessories should be pared down and intentionally chosen to go with everything. A novel concept, but it also made a lot of sense to me! I did something along these lines when Grace and I took our Europe trip last spring. That was easy because it was damp and rainy . . . I just brought a bunch of dark clothing and one big trench raincoat and basically wore the same thing over and over. If you want to read more about capsule wardrobes, the blog Un-Fancy is awesome and has tons of resources on them.

But, the one thing that has always bugged me about capsule wardrobes is that they seem to be geared toward people who wear a lot of shirt-and-pants combos. It's all about having things that match, so it's aimed at a rotation of shirts with pants/shorts/skirts. The problem is, 90% of my wardrobe is dresses. I wear dresses (or sometimes a top and a skirt) almost every. single. day. I'm just not a pants gal! It's not my style. For capsule wardrobes, that makes things tricky because you can't mix and match as much. A dress is your whole outfit, plus shoes and accessories. So with that in mind, I decided to make my own variation of a capsule wardrobe with the focus being dresses. The result is that I end up bringing a couple more pairs of shoes, jackets, and accessories than a typical capsule wardrobe calls for, because that way I have options to style my dresses (the base of my wardrobe) up or down and get more "looks" out of them. 

Capsule_Wardrobe

The photo above shows a few of the things in my capsule wardrobe for our Alaska trip. You'll notice that for my color scheme I chose neutrals with pale pink as the accent color. I'm also taking a handful of "athleisure" clothing items for long car rides and hikes/outdoor exploring. The list below is a basic snapshot of the stuff I'm bringing:

  • 3 casual dresses
  • 1 "nicer" dress
  • 2 solid color tops (1 black, 1 light pink)
  • 1 pair of black ankle jeans
  • 1 pair of jean shorts
  • 2 casual light/pullover jackets
  • 1 medium-weight cardigan
  • 1 heavier all-weather coat
  • Plus things like athletic clothing, sweatshirts, pajamas, accessories, a bathing suit, etc.

Then for shoes, I'm bringing my favorite pair of ankle booties, sneakers, flat sandals, and maybe rainboots if I can squeeze them in the car without Grace noticing. Haha!

Does the above amount of clothing look VERY small for a month to me? Yes. But, we'll have access to laundry pretty regularly, and like I said, everything matches! So I have confidence that this will work. And I'm pretty proud of how much I limited myself. Having less stuff will make our trip more manageable--the car won't be as overloaded, getting our bags into our hotel or house rental won't be as much of a pain, etc. etc. And that's the overall goal.

As you would imagine and as the first photo in this blog post shows, we are also bringing a bunch of gear and stuff we'll need other than clothing. I feel like every day I think of a new thing that we need (yesterday it was bug spray). I've gone to Target every day for the past 6 days. And while I'm still convinced I'm not thinking of everything, here's a basic overview of the gear we are bringing and what I recommend based on our past experience with camping road trips:

  • A good tent (we are so grateful to Grace's aunt Annie, who sent us the most incredible tent for our trip)
  • Folding chairs
  • Sleeping pads (we use the REI camp beds that are inflatable)
  • A sleeping bag or sheets and a cover
  • Pillows
  • Lanterns and flashlights (and extra batteries)
  • Portable chargers for cell phones
  • Camera and laptop with chargers 
  • Cooking gear: cast iron skillet, spatula, tongs, brushes for grilling, aluminum foil, cutting board, knives, utensils, enamelware plates and mugs, wine opener, bottle opener, can opener, scissors, dish towels and cloth napkins, candles, oven mitts (for taking the cast iron off the fire), long lighters, matches, newspaper for starting fires
  • Basic kitchen essentials: oil, vinegar, salt and pepper, other most-used spices, tea and coffee
  • Kettle for heating water and pour-over apparatus for making coffee
  • Big bag of favorite non-perishable car snacks
  • Sunscreen
  • First aid kit
  • Basic toolbox
  • Lint roller
  • Sponge + biodegradable dish soap for washing dishes at campgrounds
  • Small shovel/trowel
  • Trash bags
  • Toilet paper
  • Paper towels
  • Plastic zip-lock bags (I try not to go crazy with these . . . but there ALWAYS seems to be uses for them on the road)
  • Maps/guidebook such as the Milepost (for driving to Alaska specifically)
  • Bug spray
  • Umbrella and/or other foul weather gear (we are going to be encountering many, many different climates on this trip--from 100 degrees in Utah to possible snow in Alaska and British Columbia)
  • Portable fan (my brother recently gave me the most amazing fan that can clip to the top of your tent and be a ceiling fan for inside the tent--thanks, Blair!)
  • Gallons of water and water bottles
  • Dog stuff: food, water and food bowls, treats, long line (basically like a 20-foot long leash that we use to keep Willie nearby when we're cooking or whatever at a campground and don't want him to wander off, but don't want to have to hold him on a leash), Lambchop (Willie's baby), flea and tick medicine if needed, blanket (Willie likes to make nests), memory foam mat (we use this in a pinch for a dog bed or for Willie to lie on while we're doing other things around the campsite), raincoat and fleece coat
  • Travel documents and essentials (passports, Canada parks pass, rabies certificate for Willie)
  • Laundry bag to collect dirty clothes until we can do laundry
  • Personal toiletries

This list would need to be adjusted based on the type of road trip, but this is most of what we're planning on bringing with us! 

If you have any capsule wardrobe tips or tips on what gear to bring on a month-long road trip to Alaska, I'd love to hear it! Happy trails :)

In LA to Alaska Road Trip, How-To Tags packing, road trips, capsule wardrobe, gear
Comment

Amateur Photography for Camping and Life

August 25, 2017 Elizabeth Baldridge
All of the photos in this post are ones that I have taken over the past few years and am proud of! This one was taken in Ojai, California.

All of the photos in this post are ones that I have taken over the past few years and am proud of! This one was taken in Ojai, California.

Let me start by saying that I am the farthest thing from a professional photographer. A couple of years ago I didn't even really know the difference between shooting in manual and using automatic settings. I don't have super fancy photography equipment, and I have no formal training. BUT, I love to take photographs! I don't aspire to have it be anything more than a hobby, but I am passionate about taking good photos of our adventures and, perhaps most importantly, actually printing those photos so they don't just live on my phone or computer.

I have recently gotten some really sweet and touching messages about my photos as well as questions about what camera I use, etc. Today I want to share a little bit about my journey to going from an occasional iPhone photographer to using a "real" camera and exclusively shooting in manual. 

Casper

In summer 2015 Grace and I were preparing for our first big road trip: a weeklong journey North-to-South across California. I wrote about it in this post. It was during that time that I felt inspired to invest in a DSLR camera and no longer rely on phone photos only. I knew we'd be seeing some of the most gorgeous landscapes in the state, and I wanted to create a big book of photos and memories from the trip (I did, and it's one of my most cherished possessions). That summer I saved up and bought a Canon Rebel. Real photographers might be rolling their eyes because I know this is nothing fancy, but at several hundred dollars, it was still a big investment for me and a BIG improvement from iPhone photos. And guess what? Two years later, I still use that camera all the time. It's what I'll be taking with me on our Alaska trip. I might invest in a more powerful camera down the line, but it has been an amazing starter and learner camera for me. If you're curious, here's a link to something similar (the one I bought in 2015 is no longer the current model). 

A photo I took this past spring of my best friend, Anna, on a foggy morning in Malibu

A photo I took this past spring of my best friend, Anna, on a foggy morning in Malibu

Once I bought my camera, though, it quickly became apparent that I had no idea how to effectively use it. I follow a few photographers' blogs and had always read that beginners should start shooting in manual right away. Using the automatic settings really makes your DSLR more like a point-and-shoot digital camera. And the photos I took using automatic just didn't have that dreamy, light-filled quality that I loved seeing in the work of photographers I admired. That said, I had never heard of ISO, aperture, didn't know how to meter light, or any of that. Around that time (just prior to our 2015 California road trip), I decided to take an online course for shooting in manual on a DSLR. Let me tell you, that was the BEST investment. It totally changed my relationship with photography! I used a course offered through one of my favorite blogs, A Beautiful Mess. I'll link the actual course itself here. I went through each lesson and did the assigned homework over a few weeks, but you can do it at any pace you want. I suddenly knew how to adjust my depth of focus, where to set my shutter speed, how to find the best light, how to take portraits, and more. Total game changer.

My favorite sunset of all time at Pismo Beach, California, in August 2015

My favorite sunset of all time at Pismo Beach, California, in August 2015

Ever since then, I haven't taken any more classes or formal training, but I have been practicing constantly. 99% of the photos on this blog are ones that I have shot in manual with my DSLR (there are a few iPhone photos thrown in too), and I always bring my camera on road trips or weekends out and about. I've heard a saying from a few photographers that I totally agree with: the best camera you have is the one on you. I know so many people who have nice cameras and never use them because they think it will be bulky or they just forget. So training myself to bring my camera with me all the time has been a big part of getting beautiful photos from my vacations and day-to-day life! 

My cutie baby brother up in the clouds on a mountaintop

My cutie baby brother up in the clouds on a mountaintop

Over time, things like ISO, shutter speed, and f-stops have become second nature. I've also developed my own shooting style. I really like crisp, clear, light-filled photography. No crazy effects or angles for me. I have friends who are photographers and who underexpose photos or take them in low light, and they look awesome. It's just not my style. If anything, I tend to intentionally overexpose photos in many situations. It's been good to learn what I like my photos to look like and not to emulate the work of others (though of course, we're always inspired by others all the time and that translates to creative pursuits in a good way). 

Grace_Ojai
Santa_Cruz_Forest
Sausalito_Boats

I'm not a purist when it comes to taking photos. Some of my all-time favorite photos were taken with self-timer on a tripod or balanced on top of a stack of books (for what it's worth, you can still shoot in manual while using self-timer! I do it all the time). I also recently upgraded my iPhone from 2014 for a new iPhone 7+, and the photo quality is AMAZING. In some situations, it's actually (dare I say) better than a DSLR because it's so quick to grab and take a photo, and you don't have to mess with the settings.

My goal is to capture meaningful moments and beautiful settings for Grace and me to look back on. Not to impress people or win any photography awards. We absolutely love to flip through the photobooks I've made from our travels, and I have a few stacks of printed photos lying around my house that guests always thumb through. That's the point. Not for Instagram or anything else online. Photos are heirlooms to me. I love thinking about looking back at my prints, photo books, and framed memories as I get old.

Just a few of my printed photos, photobooks, and journals from over the years.

Just a few of my printed photos, photobooks, and journals from over the years.

I hope you enjoyed reading about my philosophy and process for amateur photography! I can't wait to take a billion photos in Canada and Alaska next month!

Ojai_Valley
Chesapeake_Dock
And of course, the best photo of all is always the one with those you love in it.

And of course, the best photo of all is always the one with those you love in it.

In How-To, Personal Tags photography, amateur photography, camping
2 Comments

Budgeting for a Month-Long Road Trip

August 21, 2017 Elizabeth Baldridge
Photo from the Banff Tourism Website--not related to budgeting, but having images like this as my desktop background has been a major budgeting motivator :)

Photo from the Banff Tourism Website--not related to budgeting, but having images like this as my desktop background has been a major budgeting motivator :)

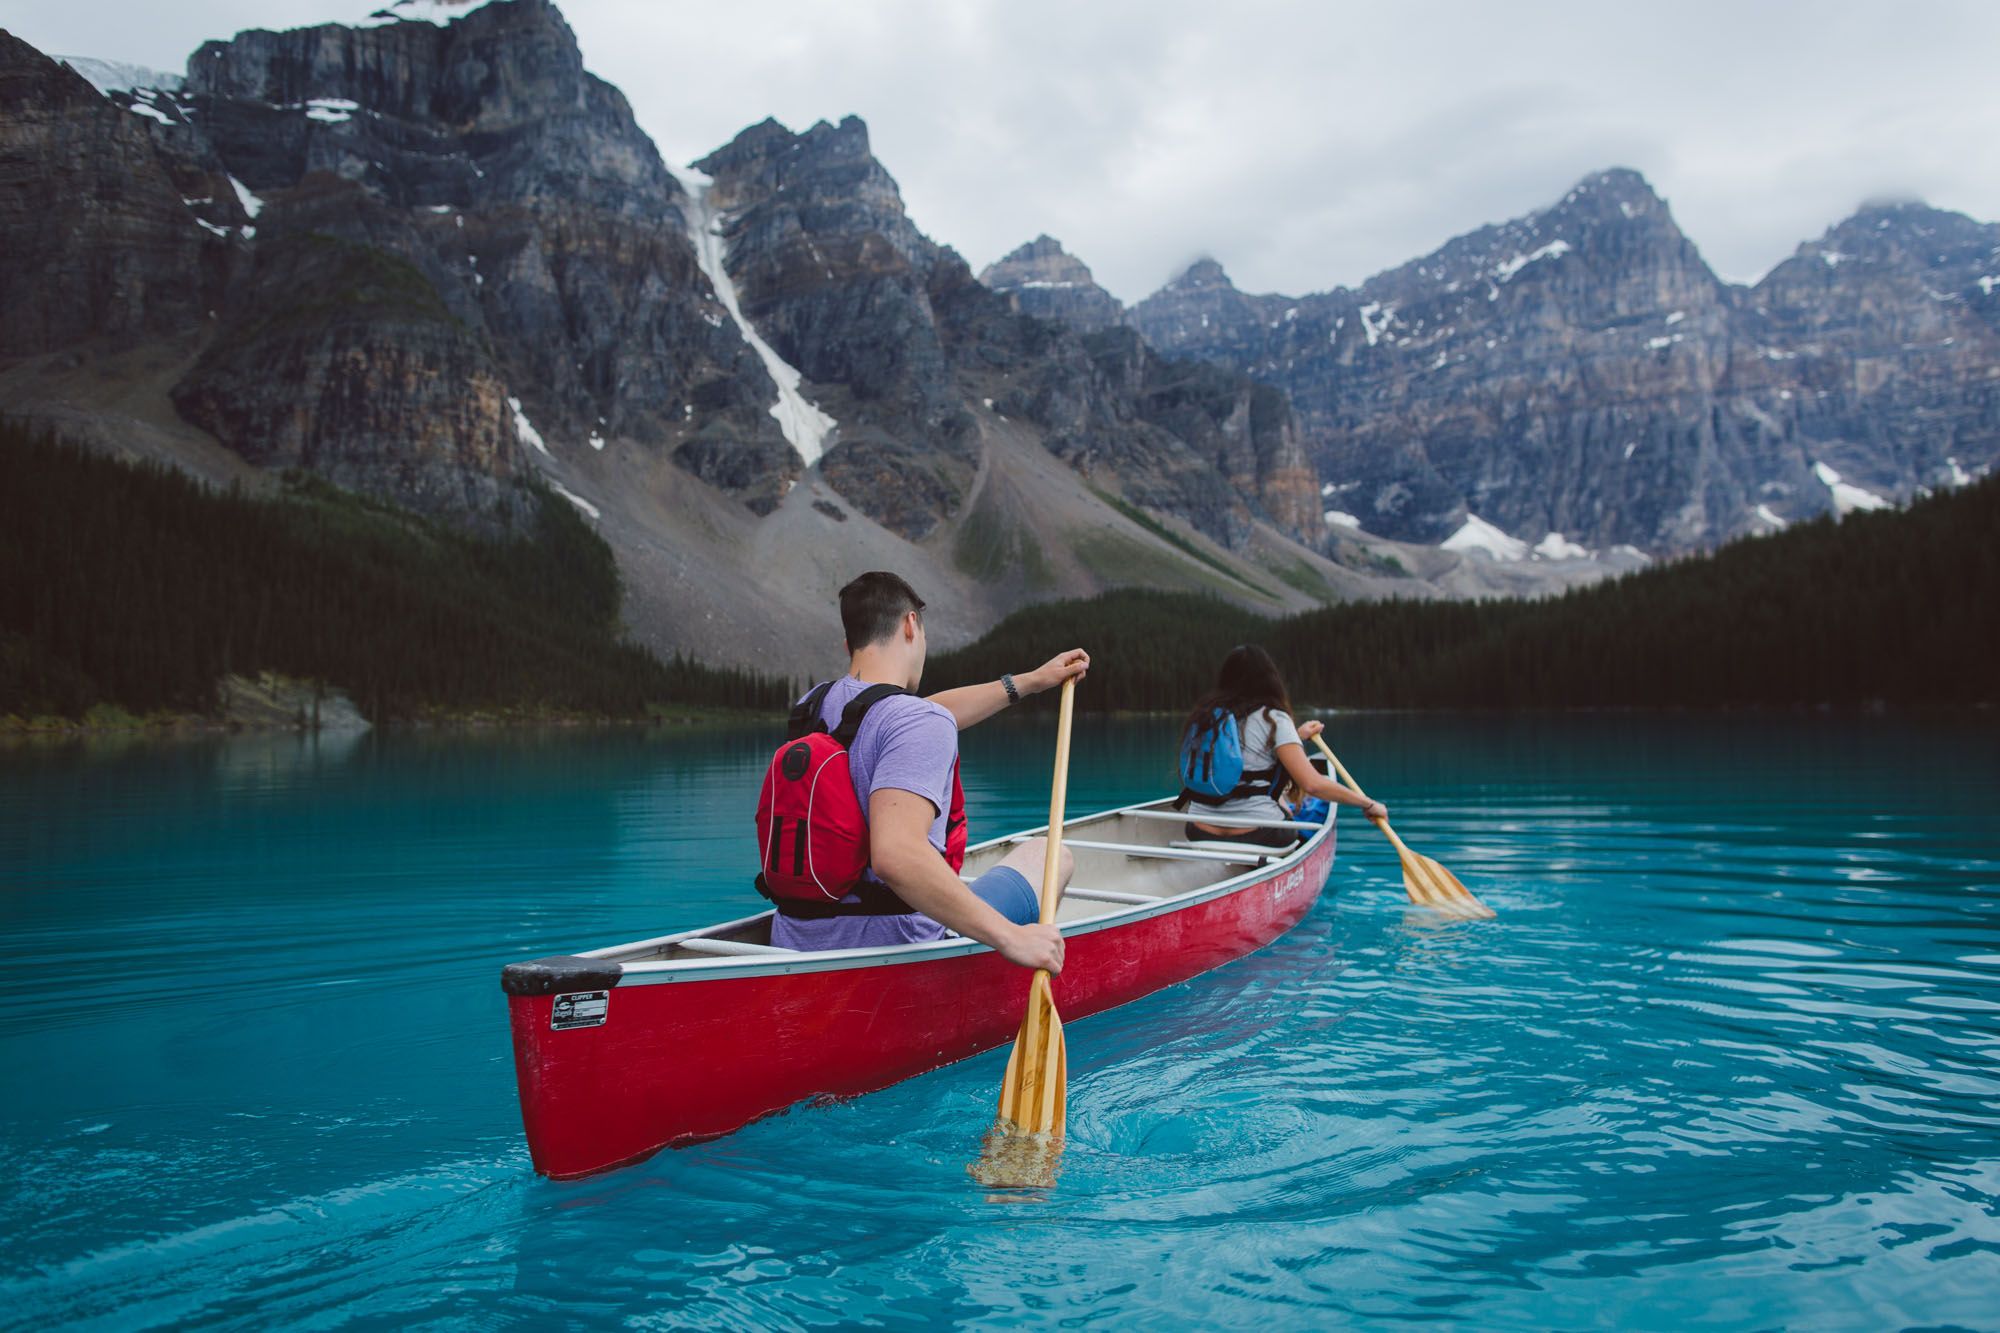
As I shared in my post about planning our Alaska road trip, this isn't a cheap vacation by any means. I think a lot of people (including myself, initially) think that a road trip is an economical way to travel. When covering short distances, it is. For example, driving from LA to San Francisco is always going to be cheaper overall than buying a plane ticket. But when you start thinking about being on the road for several weeks or a month, it adds up SO much because you have to pay for accommodations for every single night. Also, Grace and I will be making $0 during the time we are gone--we're not using paid vacation time or anything like that. So I've had to save up about 2 months worth of rent and other bills to provide a safety net for that gap. 

If you're not planning a long road trip or particularly interested in finances and budgeting, you might want to skip right over this post. It's hard to make this stuff anything but dry. However, my hope is that this post will be helpful for someone who is starting to plan a long road trip. Below, I'm going to talk about all of the major categories of budgeting and spending that went into planning this trip, as well as a few random expenses that you might not imagine would crop up!

But first, I want to link to a blog post that was inspiring to me, from photographer Jenner Kutcher who recently spent a month in Hawaii with her husband. She writes, "The truth is, nothing is promised. What would it look like for you to set aside a few hundred dollars each month? What would it look like if you sat down and ran the numbers to see if you could make that dream happen? What would it look like for you to budget so that these dreams could become a reality? When you hear we will be in Hawaii for a month, instead of wondering how we are making it happen or questioning if we won the lottery and didn't tell anyone, understand that when you learn how to budget, save, and spend carefully, you are granted opportunities that might not be in reach otherwise!"

Yes. That is my philosophy for this month-long vacation in a nutshell. I hope this post inspires you to consider the same!

Basic Costs of the Trip Itself:

The first and most obvious cost of a trip like this is accommodations. Per night, our costs of accommodations range from free (thanks to my sweet college bff Anna who is hosting us in Portland), to $30-40 for a campsite, to around $500 for some splurge hotel stays. All in all, we're averaging about $80/night, which isn't too bad in my opinion. But there are clearly some major outliers on either side of that. In some places, we could have certainly saved money and chose not to, but be prepared that in some of the tiny towns in remote parts of British Columbia there is usually 1 dog-friendly motel that costs about $150 a night, and that's your only option. And it might be 100 miles to the next town. I'm personally not comfortable (safety-wise) with pulling over to the side of the road and sleeping in our car, but people do that for sure. So your costs could vary completely based on what type of experience you want to have.

Next, be sure to budget for fuel. We're expecting to fill up once or twice a day (Grace's car can make the drive from LA to San Francisco on one tank of gas, which is a little longer than the average distance we'll be covering per day). I've heard that in Alaska and some remote parts of Canada, gas can be extremely expensive. Gas is sold by the liter rather than the gallon in Canada, and it also is (obviously) going to be in a different currency. I found this formula for translating the price in CAD per liter to roughly the price in USD per gallon: multiply the price per liter by 3.785, and then adjust for the exchange rate (multiply the result by roughly 0.8, based on the current exchange rate).

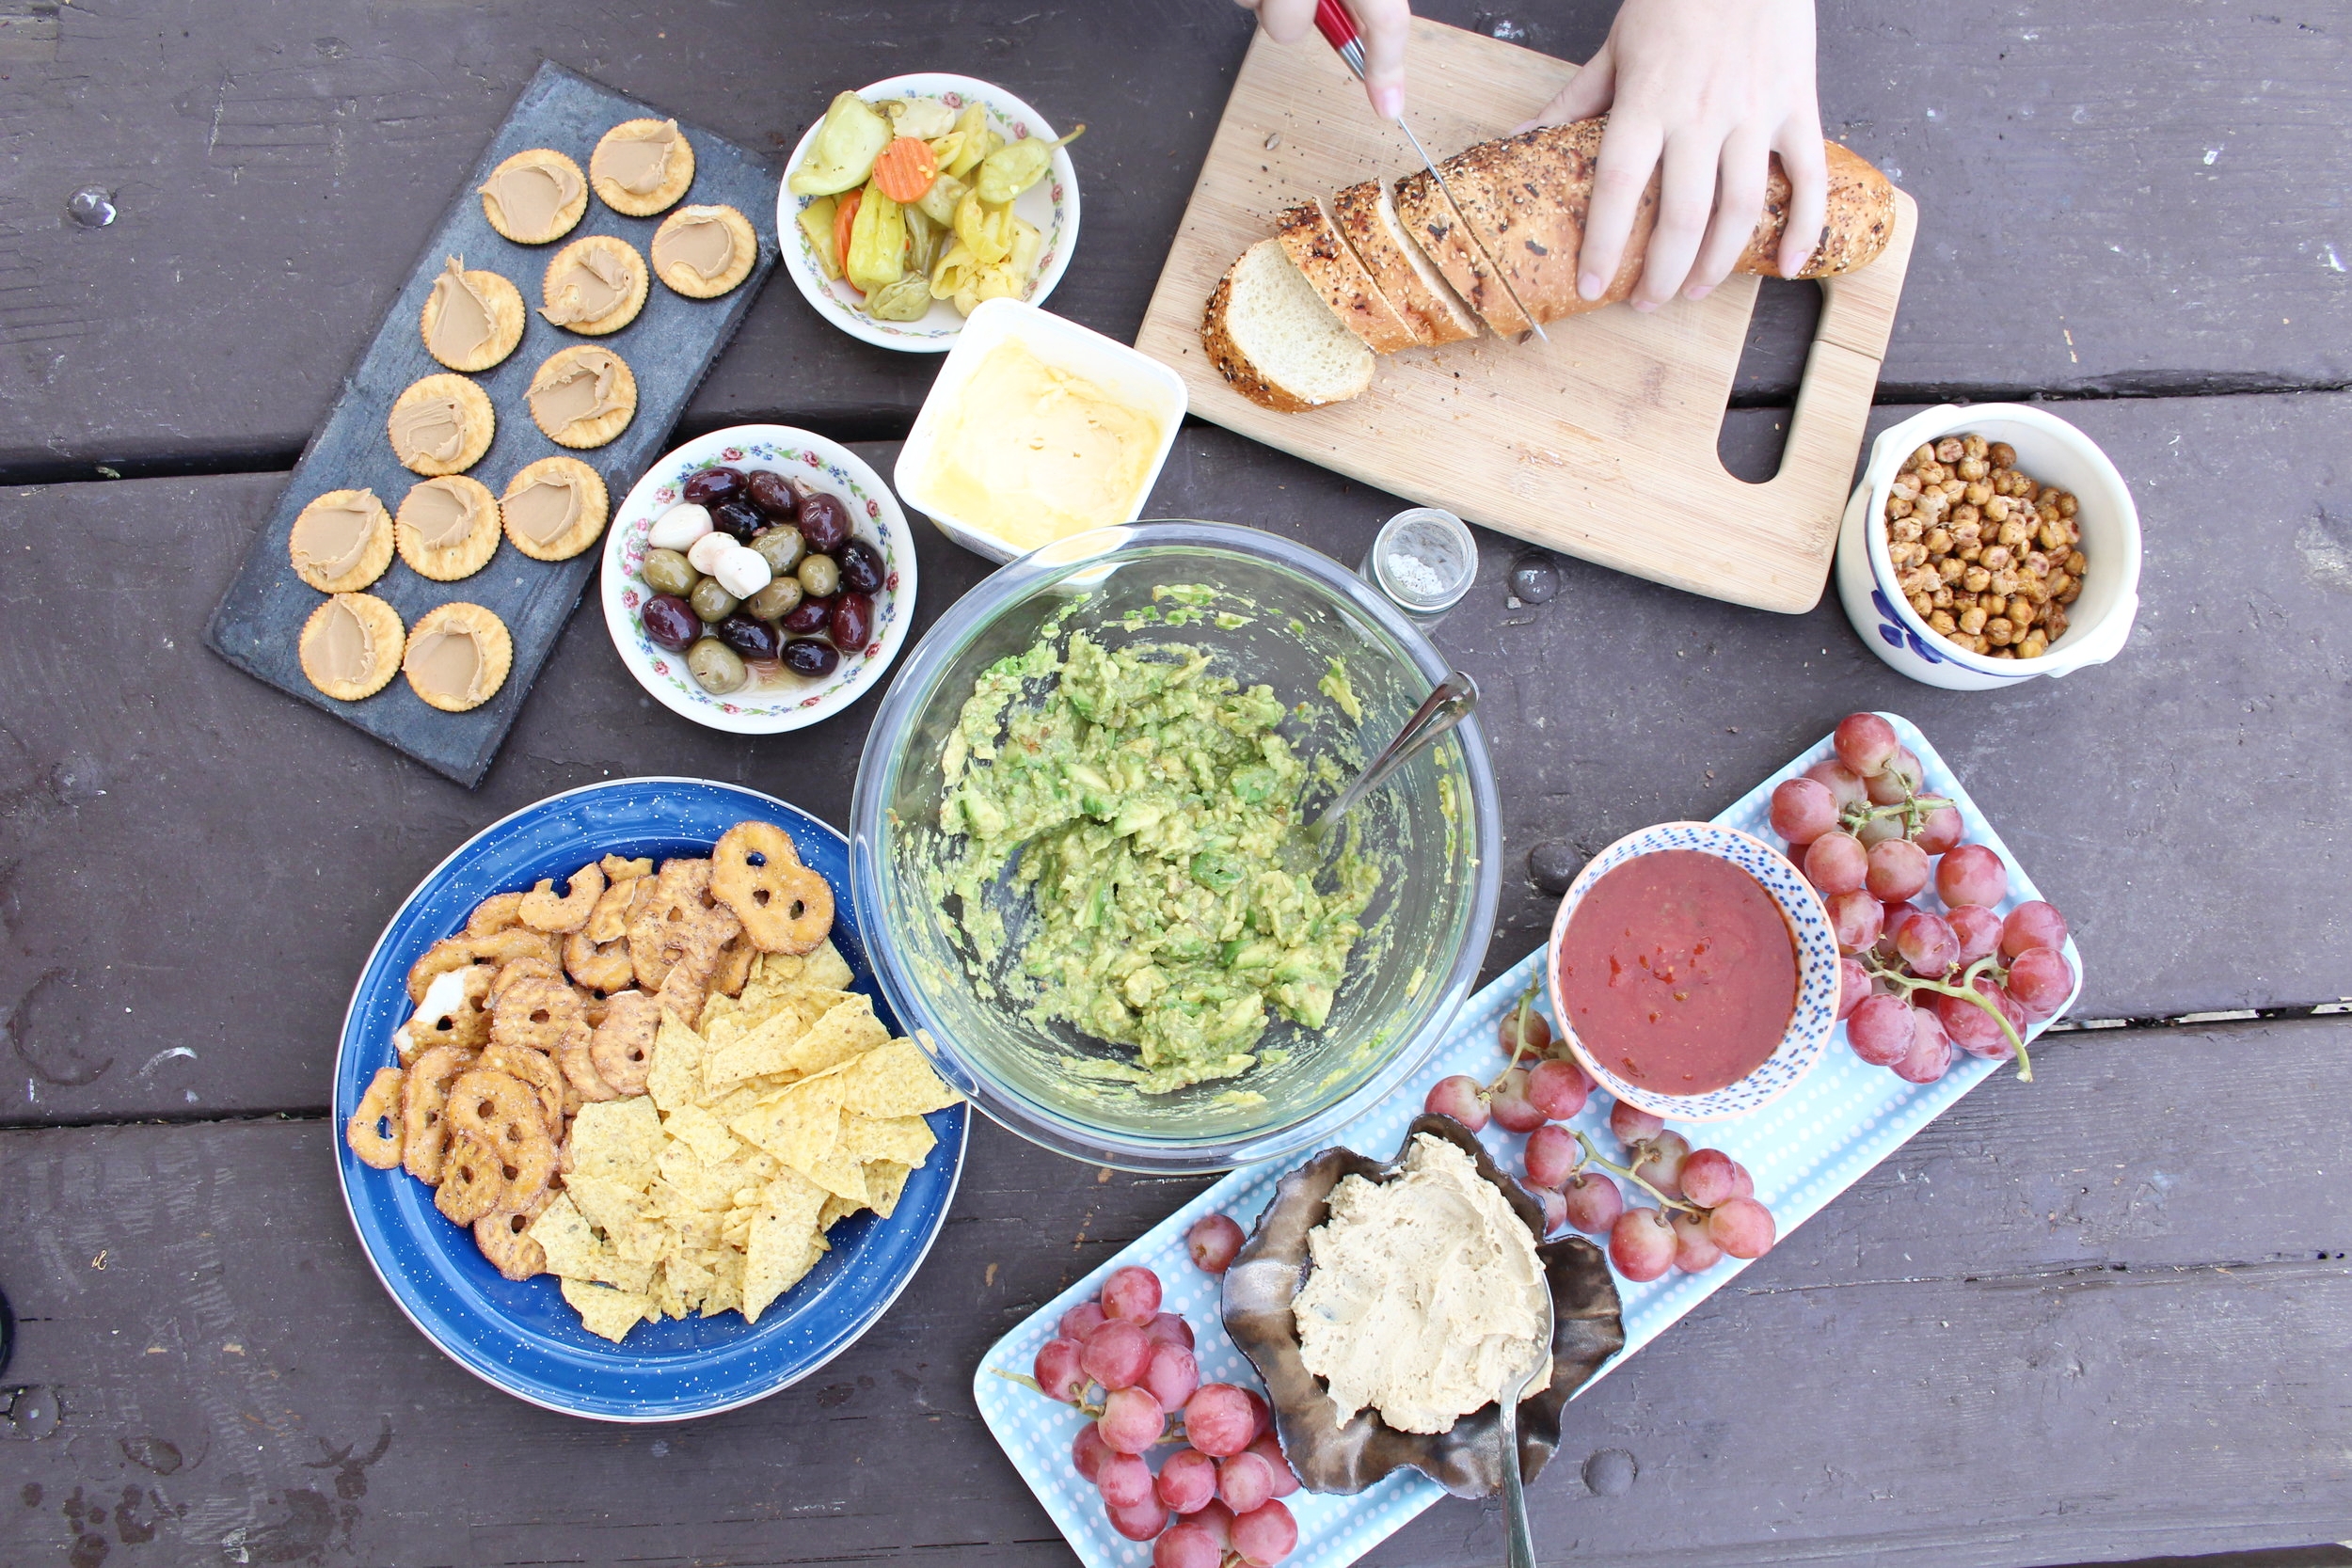
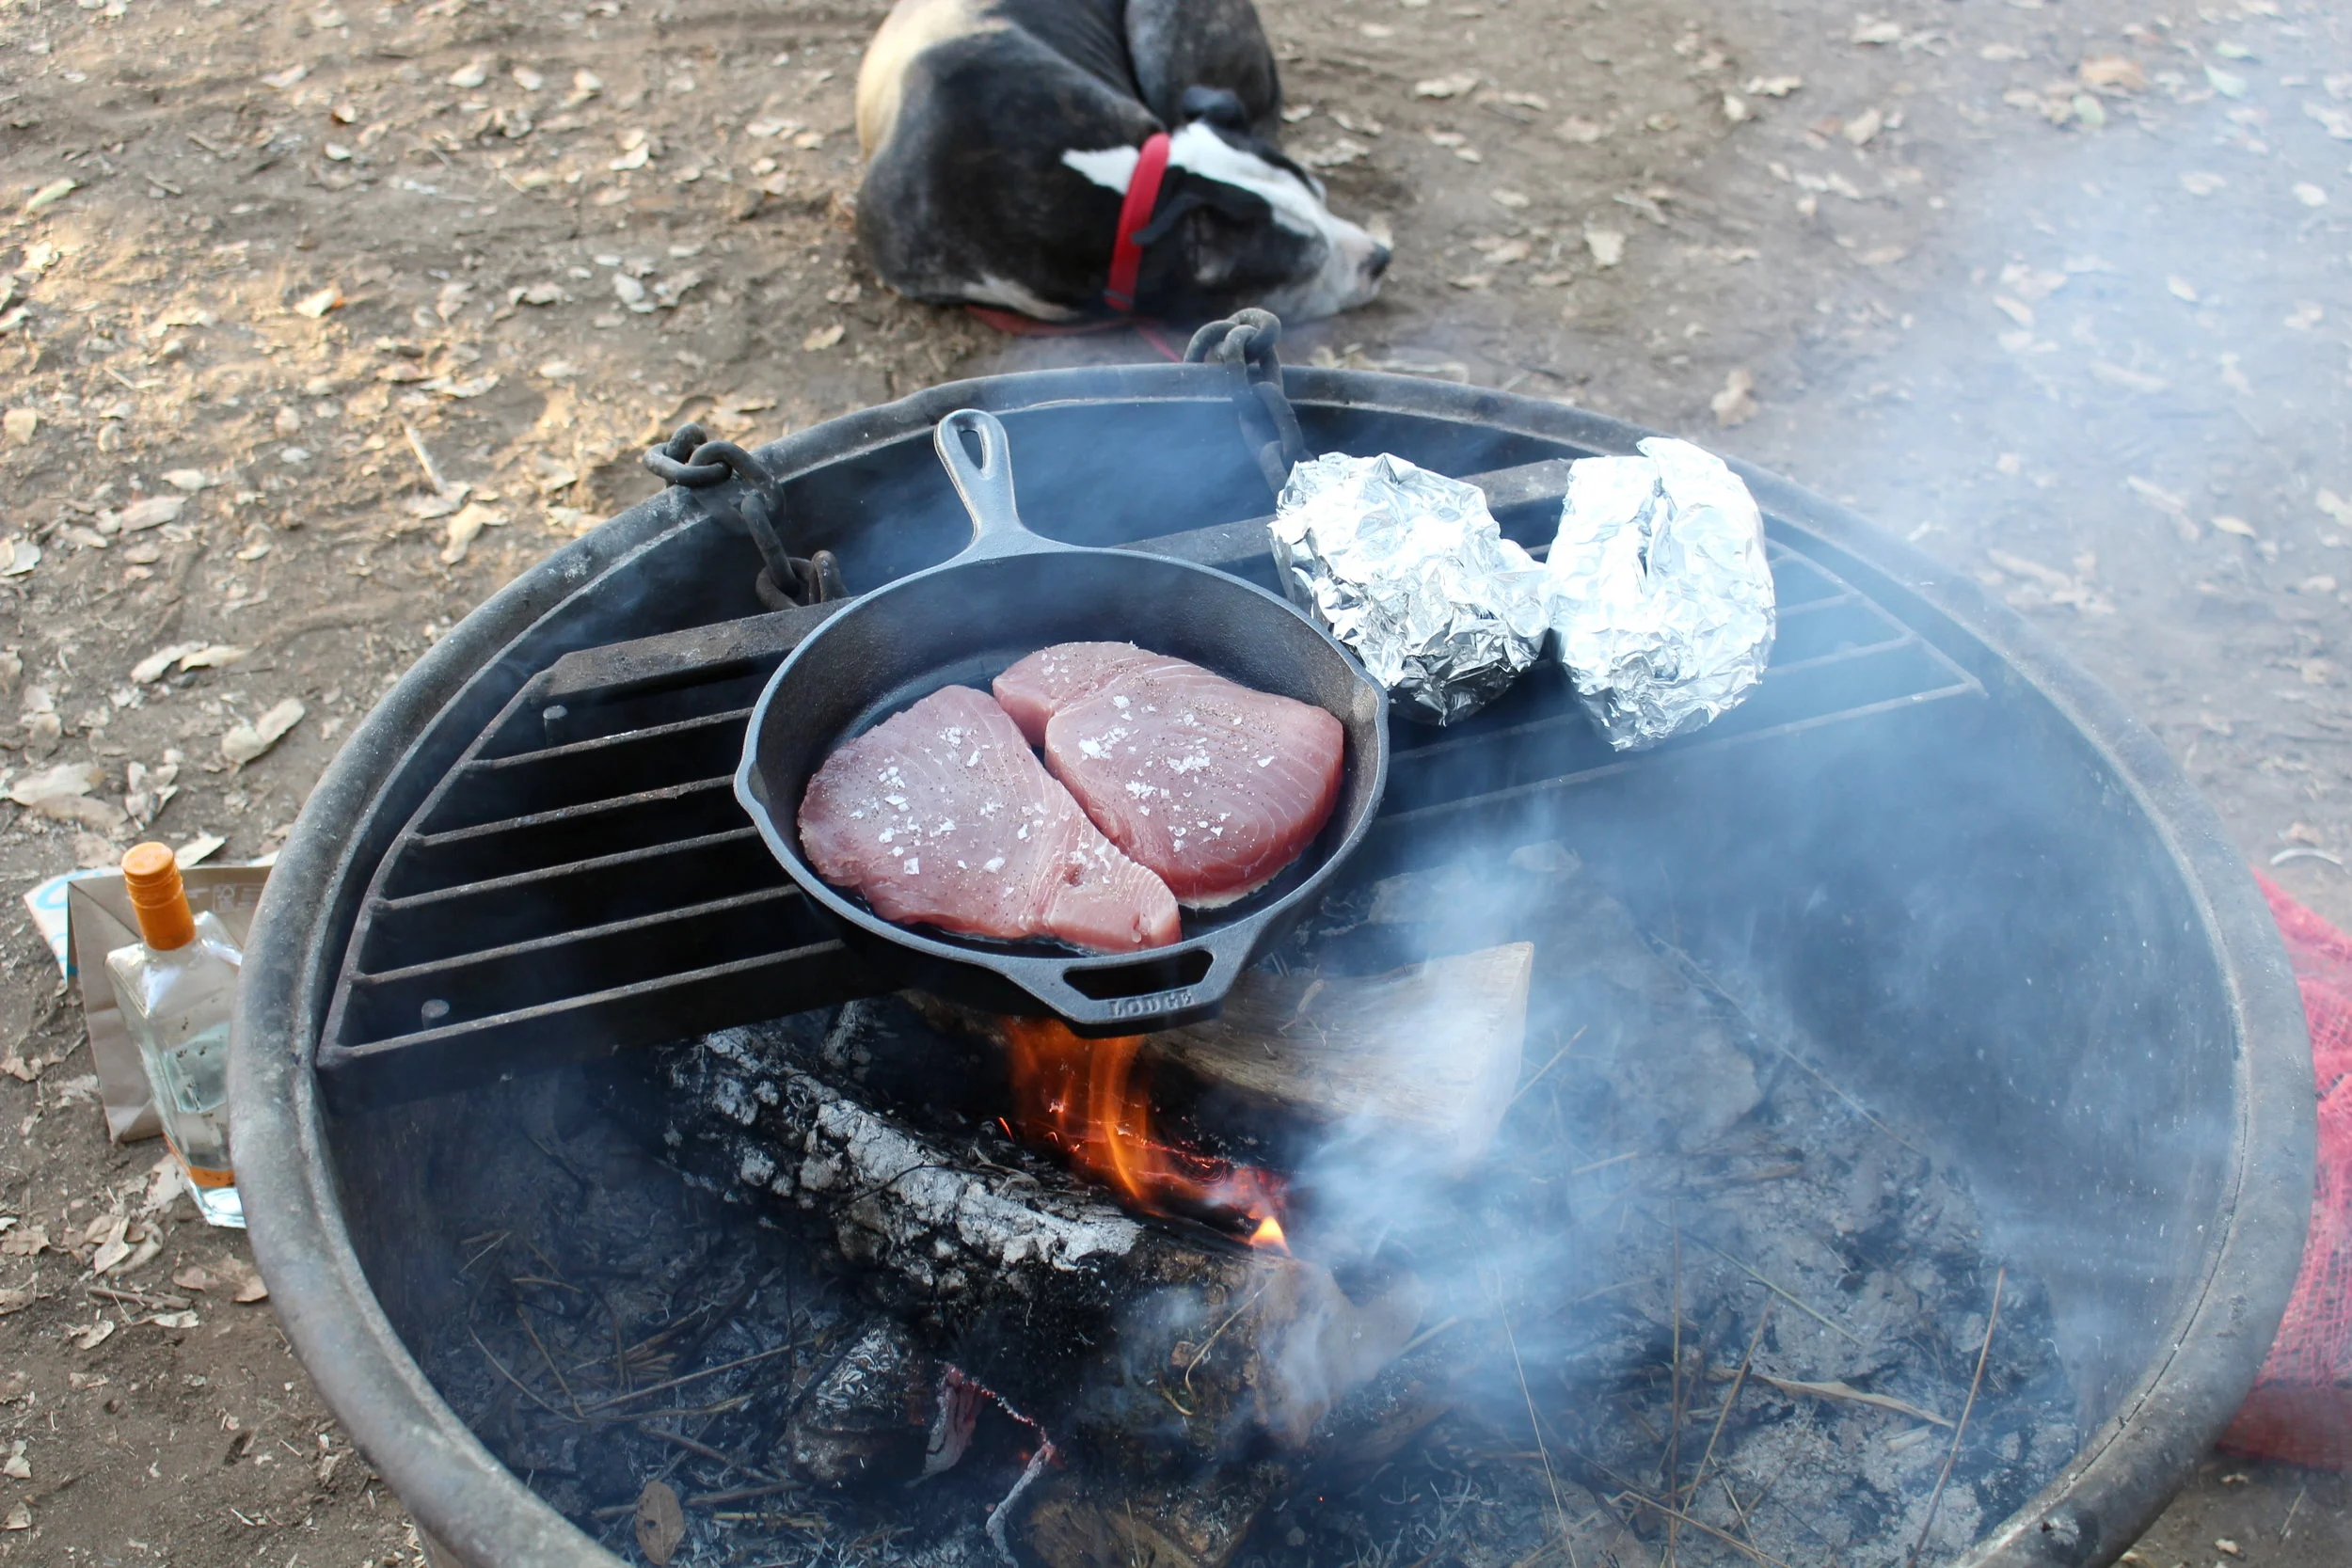
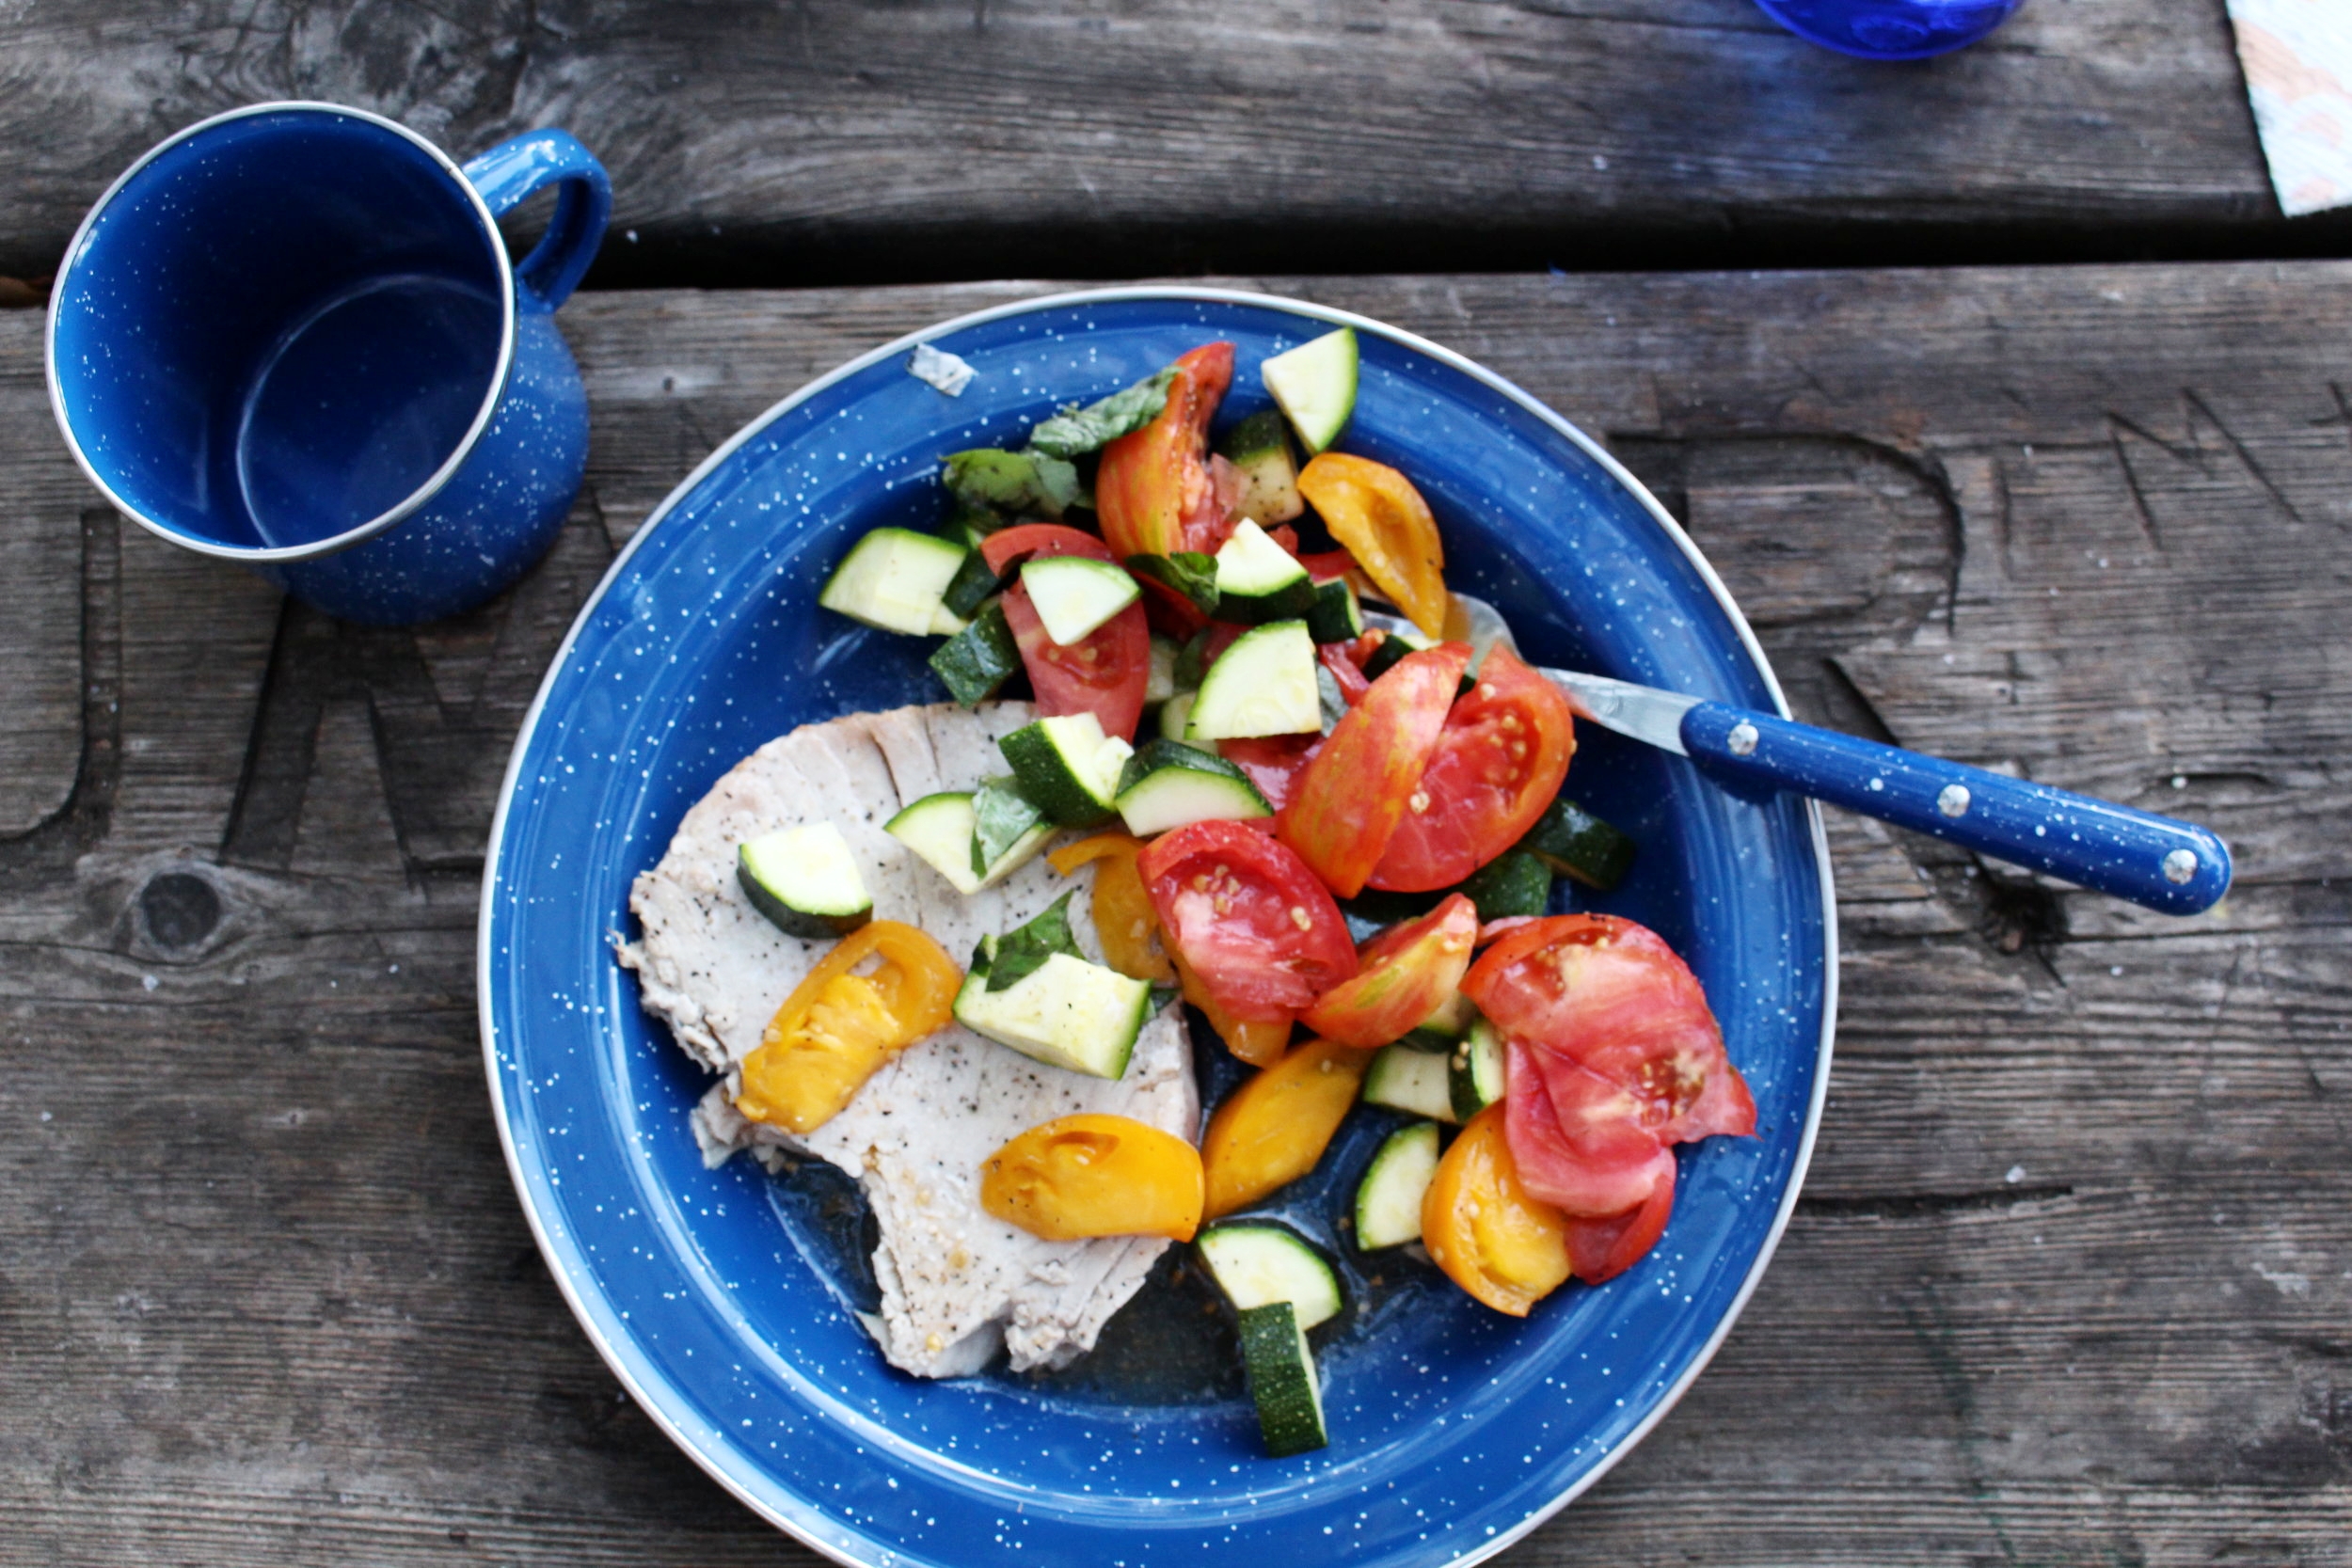
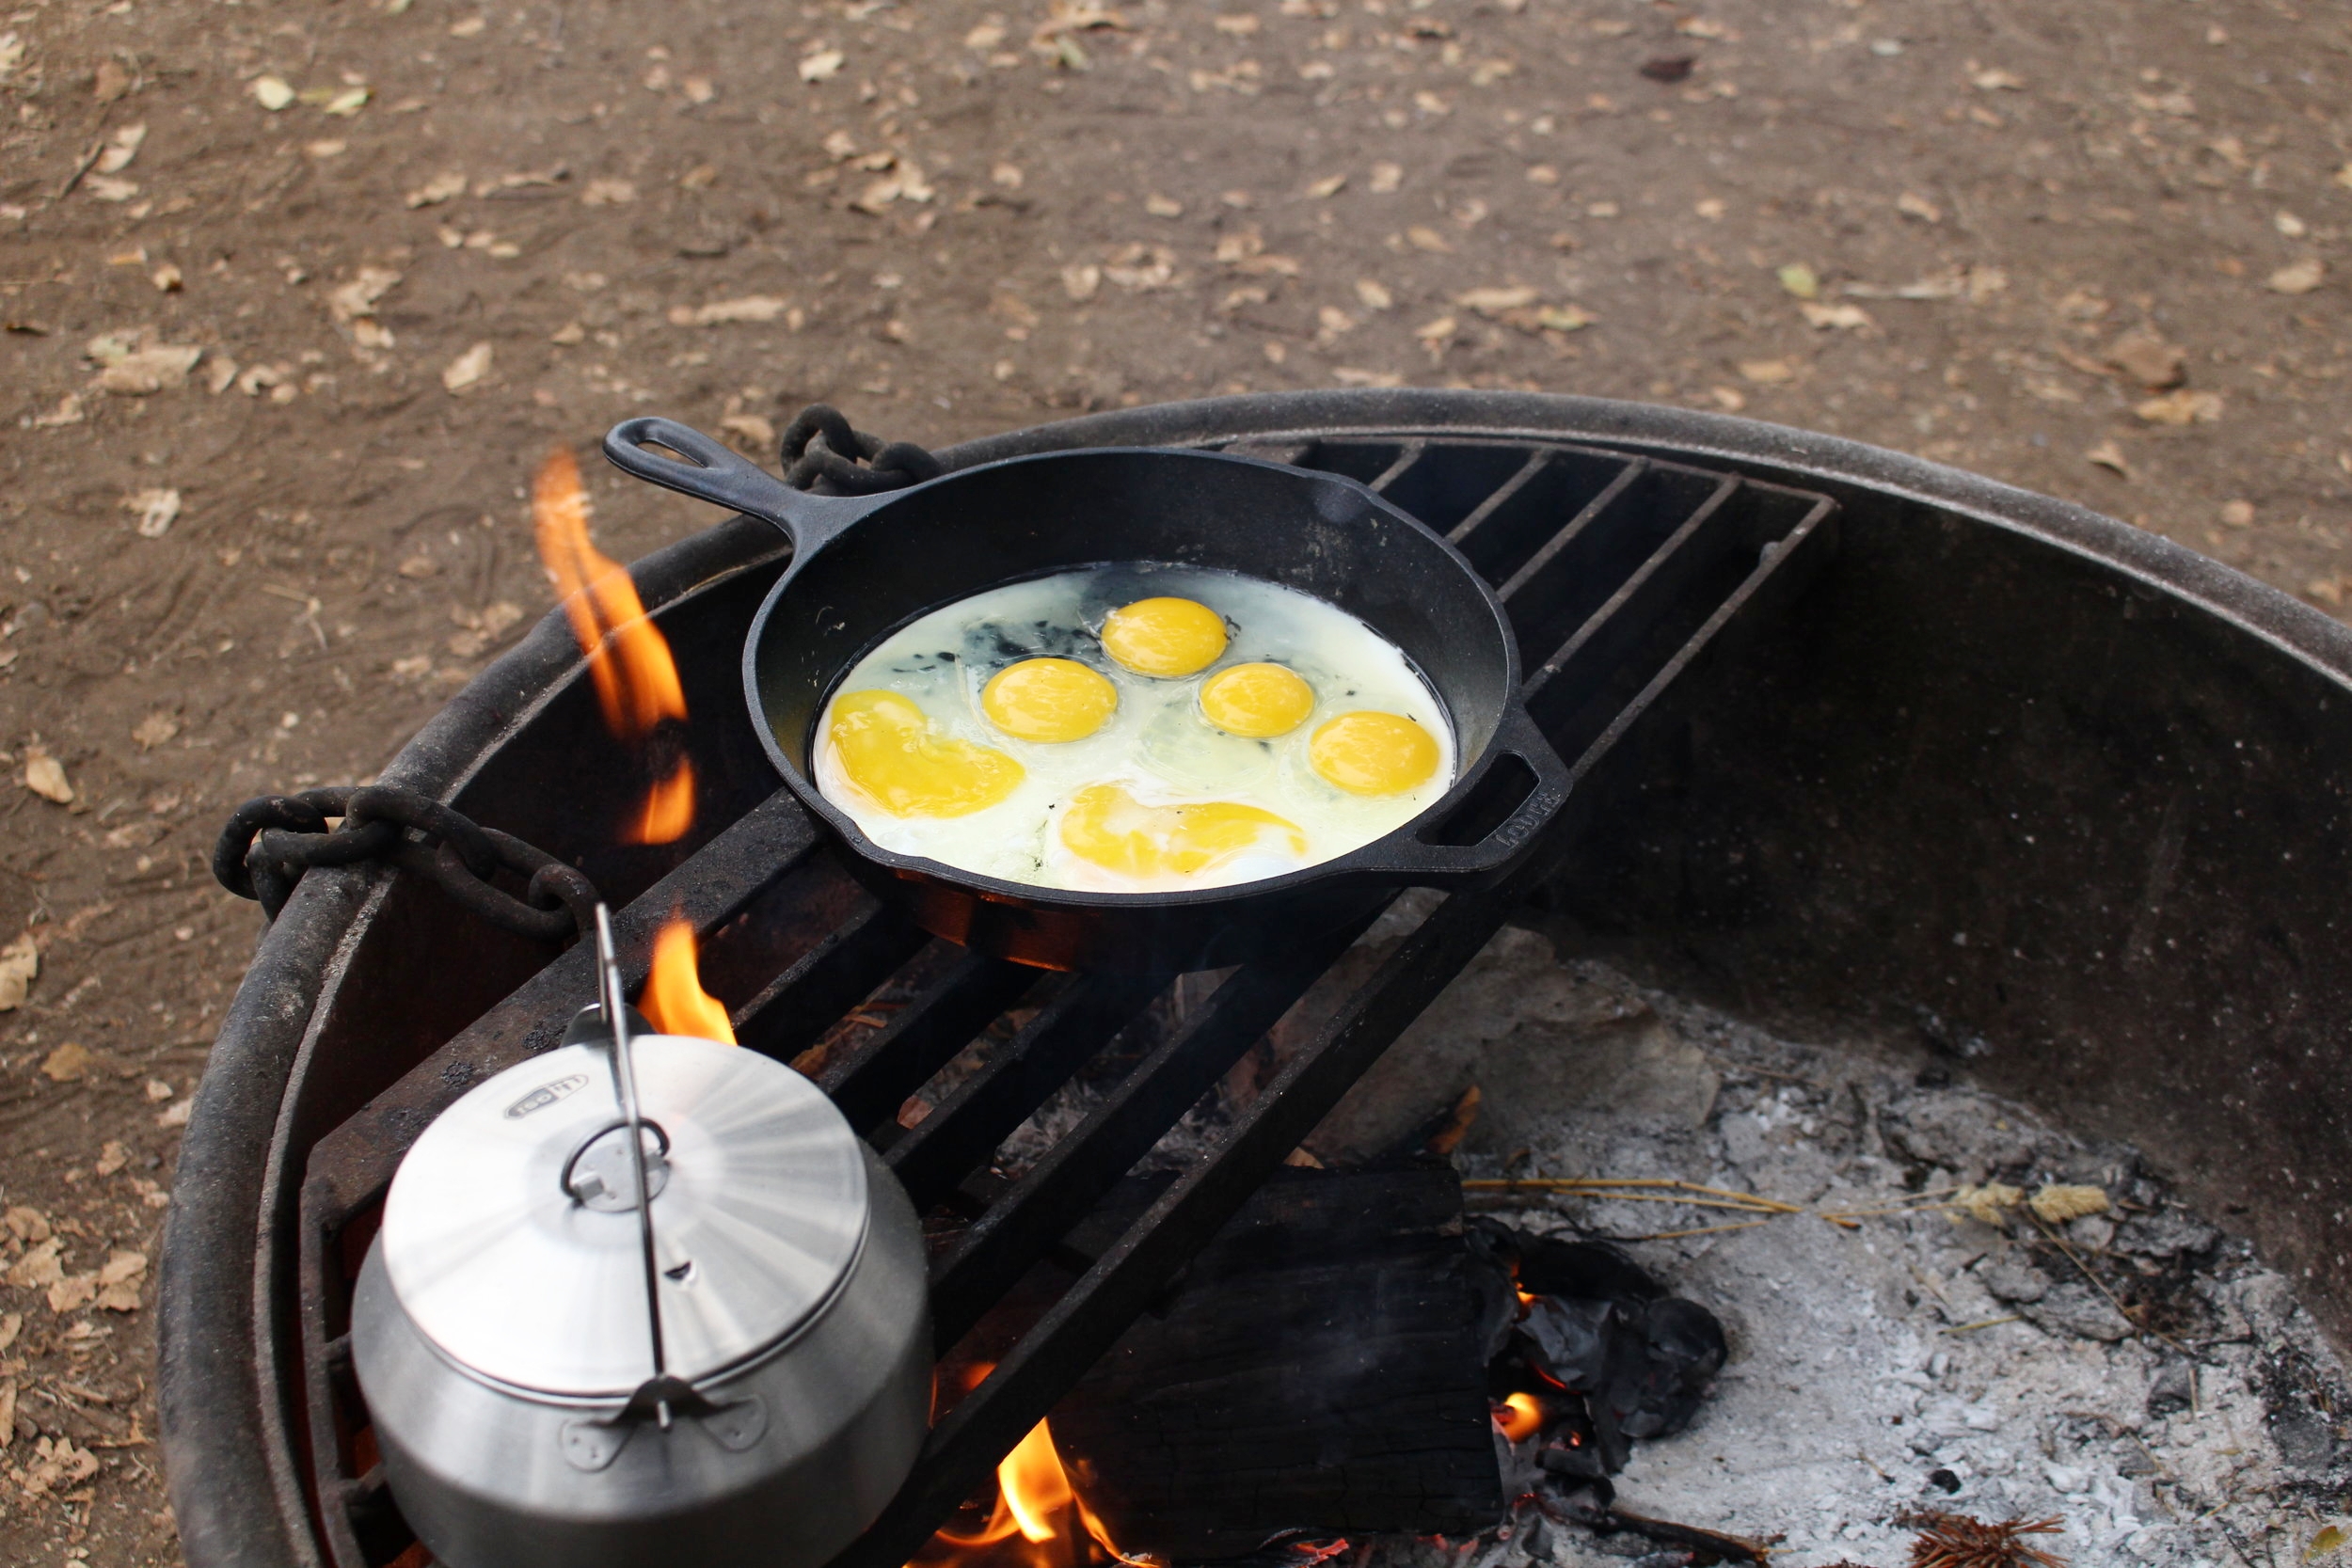
Food and incidentals along the way. I'm not expecting this to be way higher than our usual cost of food at home (especially given that we live in a very expensive locale to begin with), but I've budgeted a bit extra than usual in this category so that we can try everything we want!

The Backend, "Real Life" Costs:

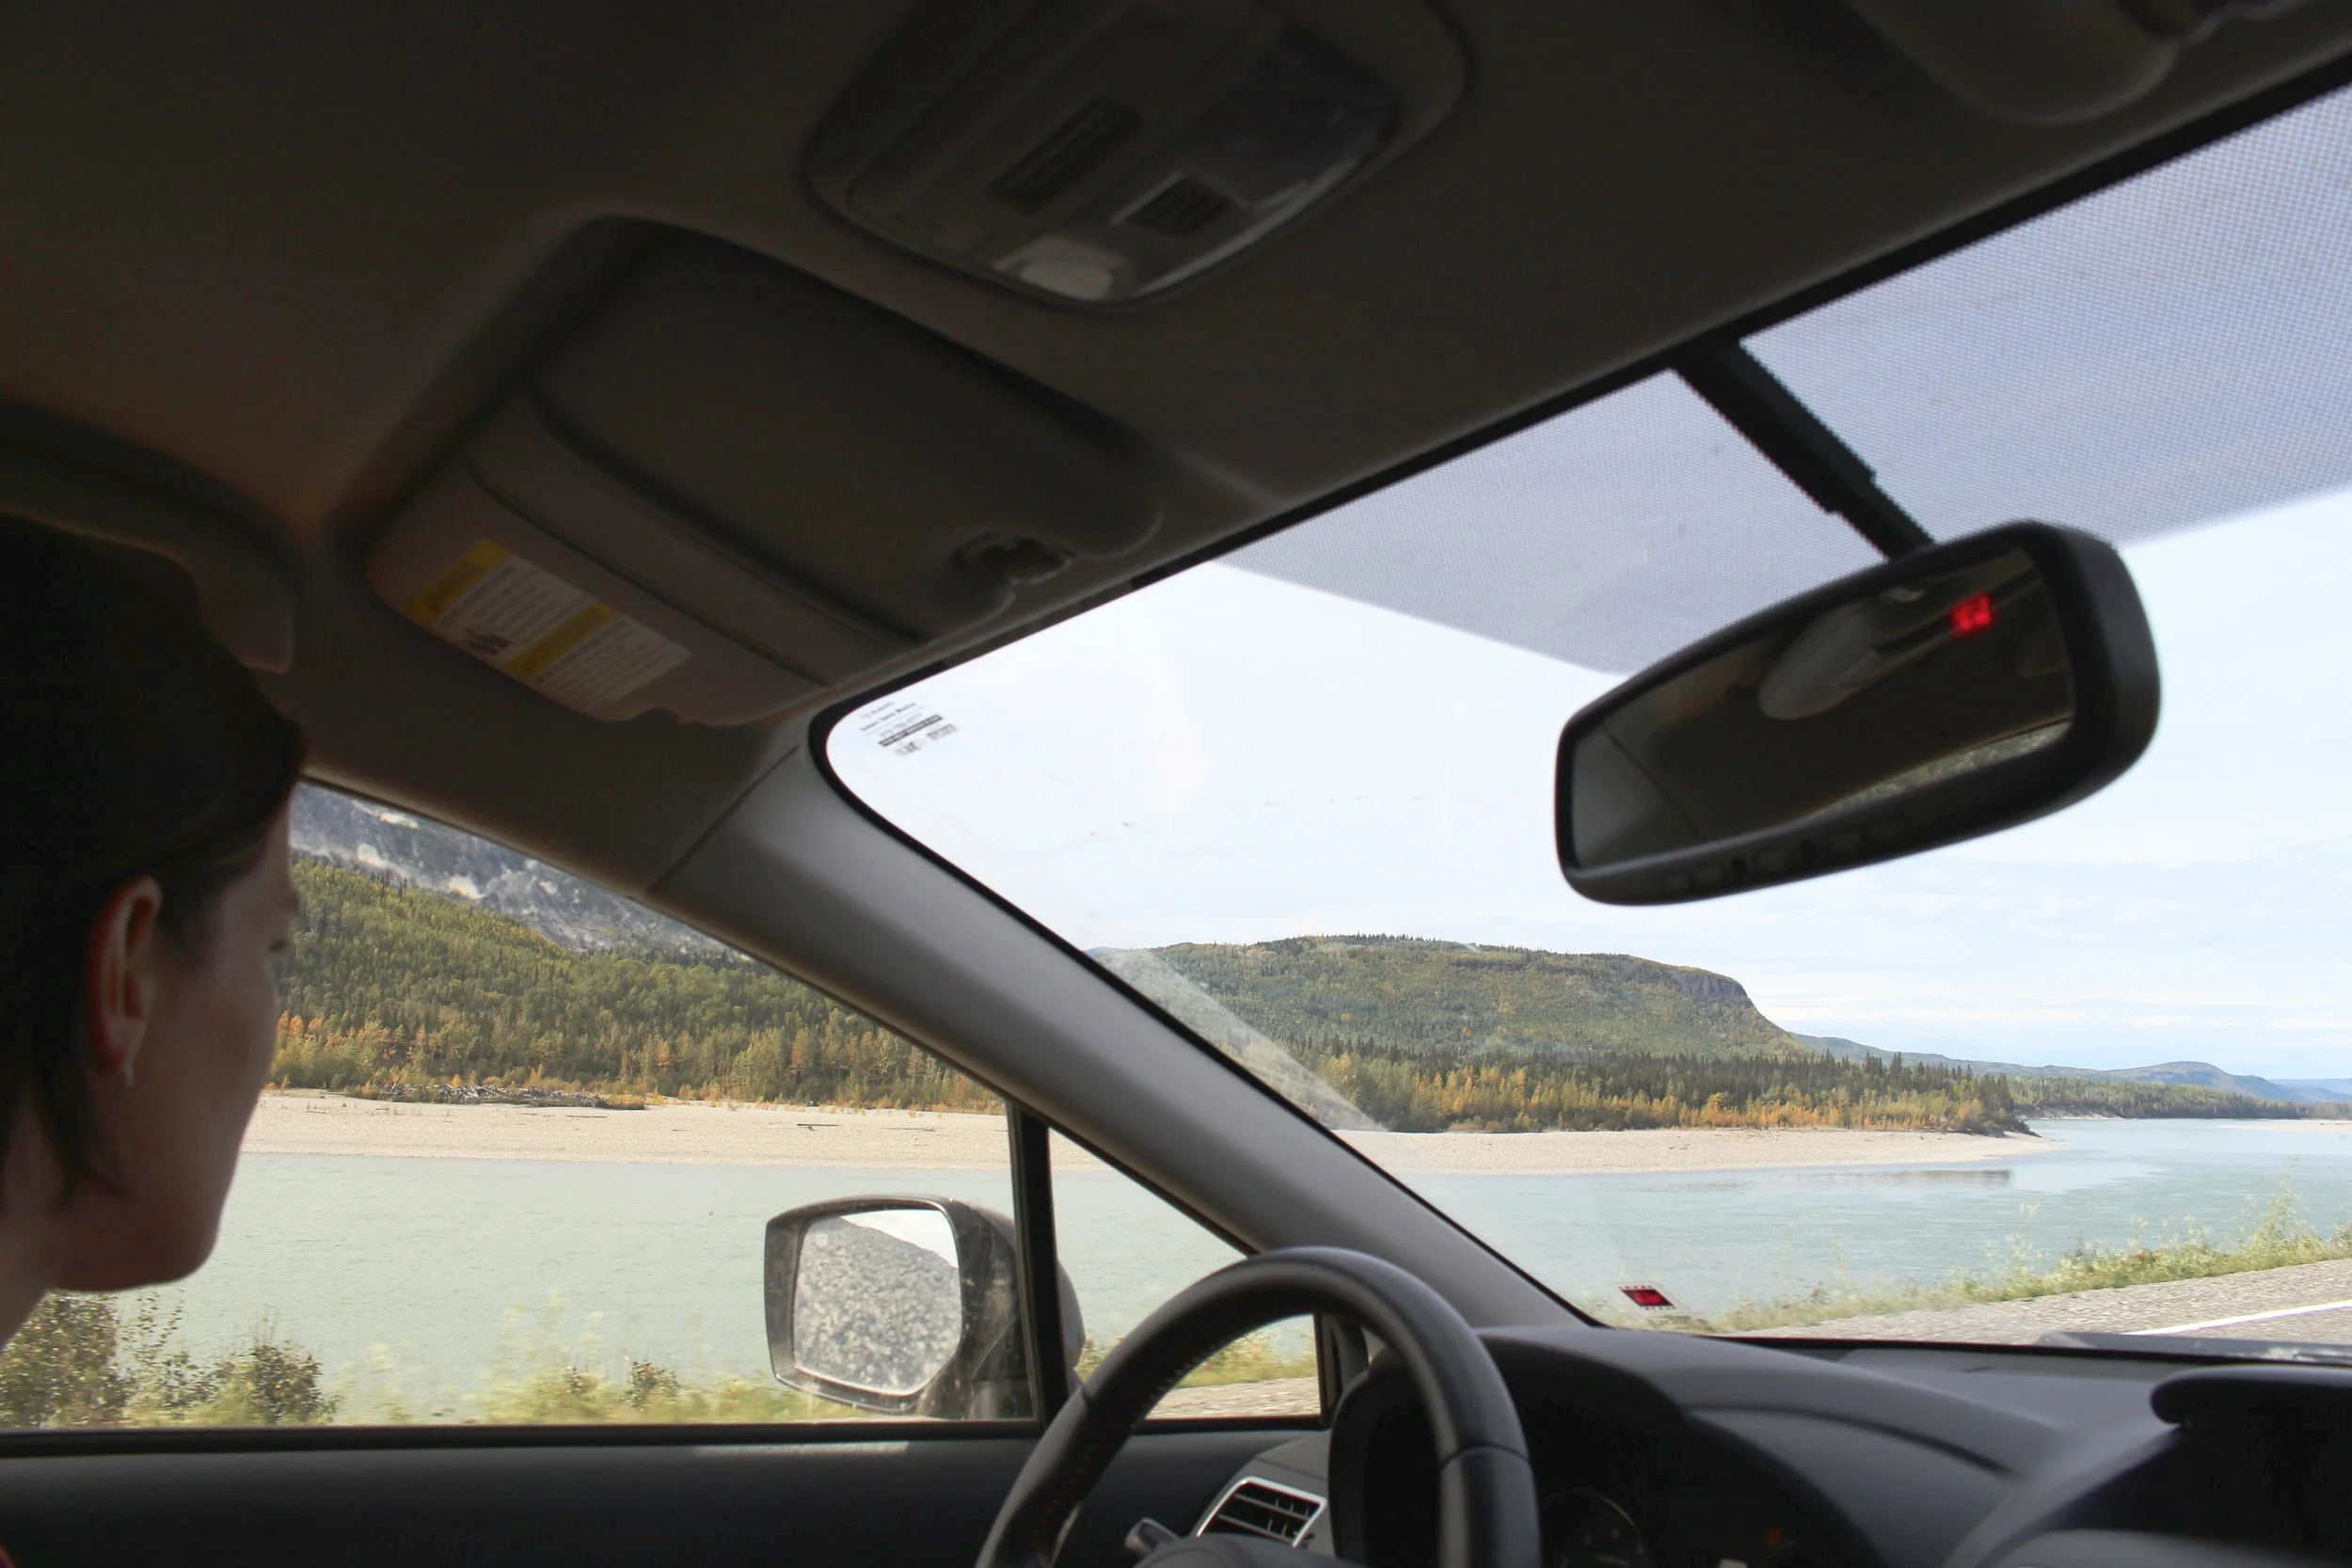
One thing I was adamant about on this trip was that I wouldn't go into any debt and wouldn't financially disadvantage myself for when we come back (sidenote: we paid for this trip 100% in cash/debit and plan to do so the entire time we are traveling. I know you might be thinking we're crazy for not utilizing credit card points or whatnot, but we are big big believers in just paying for things outright; neither of us has ever had a cent of debt in our lives and we consider ourselves extremely lucky! We love the feeling of the financial side of things literally and figuratively being in the rearview mirror the whole way--we're not the "enjoy it now, pay for it later" type of people. Also, this isn't to say that it's bad to pay for things with credit or that people who use credit cards are necessarily in debt. Take with a grain of salt, this is just our philosophy). So, with all of this in mind, a very real and not-so-fun budgeting portion of this trip has been that I have saved up enough to cover 2 months of living expenses for when I get back. I'll be starting my new job in that time, but I don't want things to be tight, so I built this safety net and I'm so glad I did. I think I will enjoy the trip 10 times more because of it.

More Piecemeal/Random Costs:

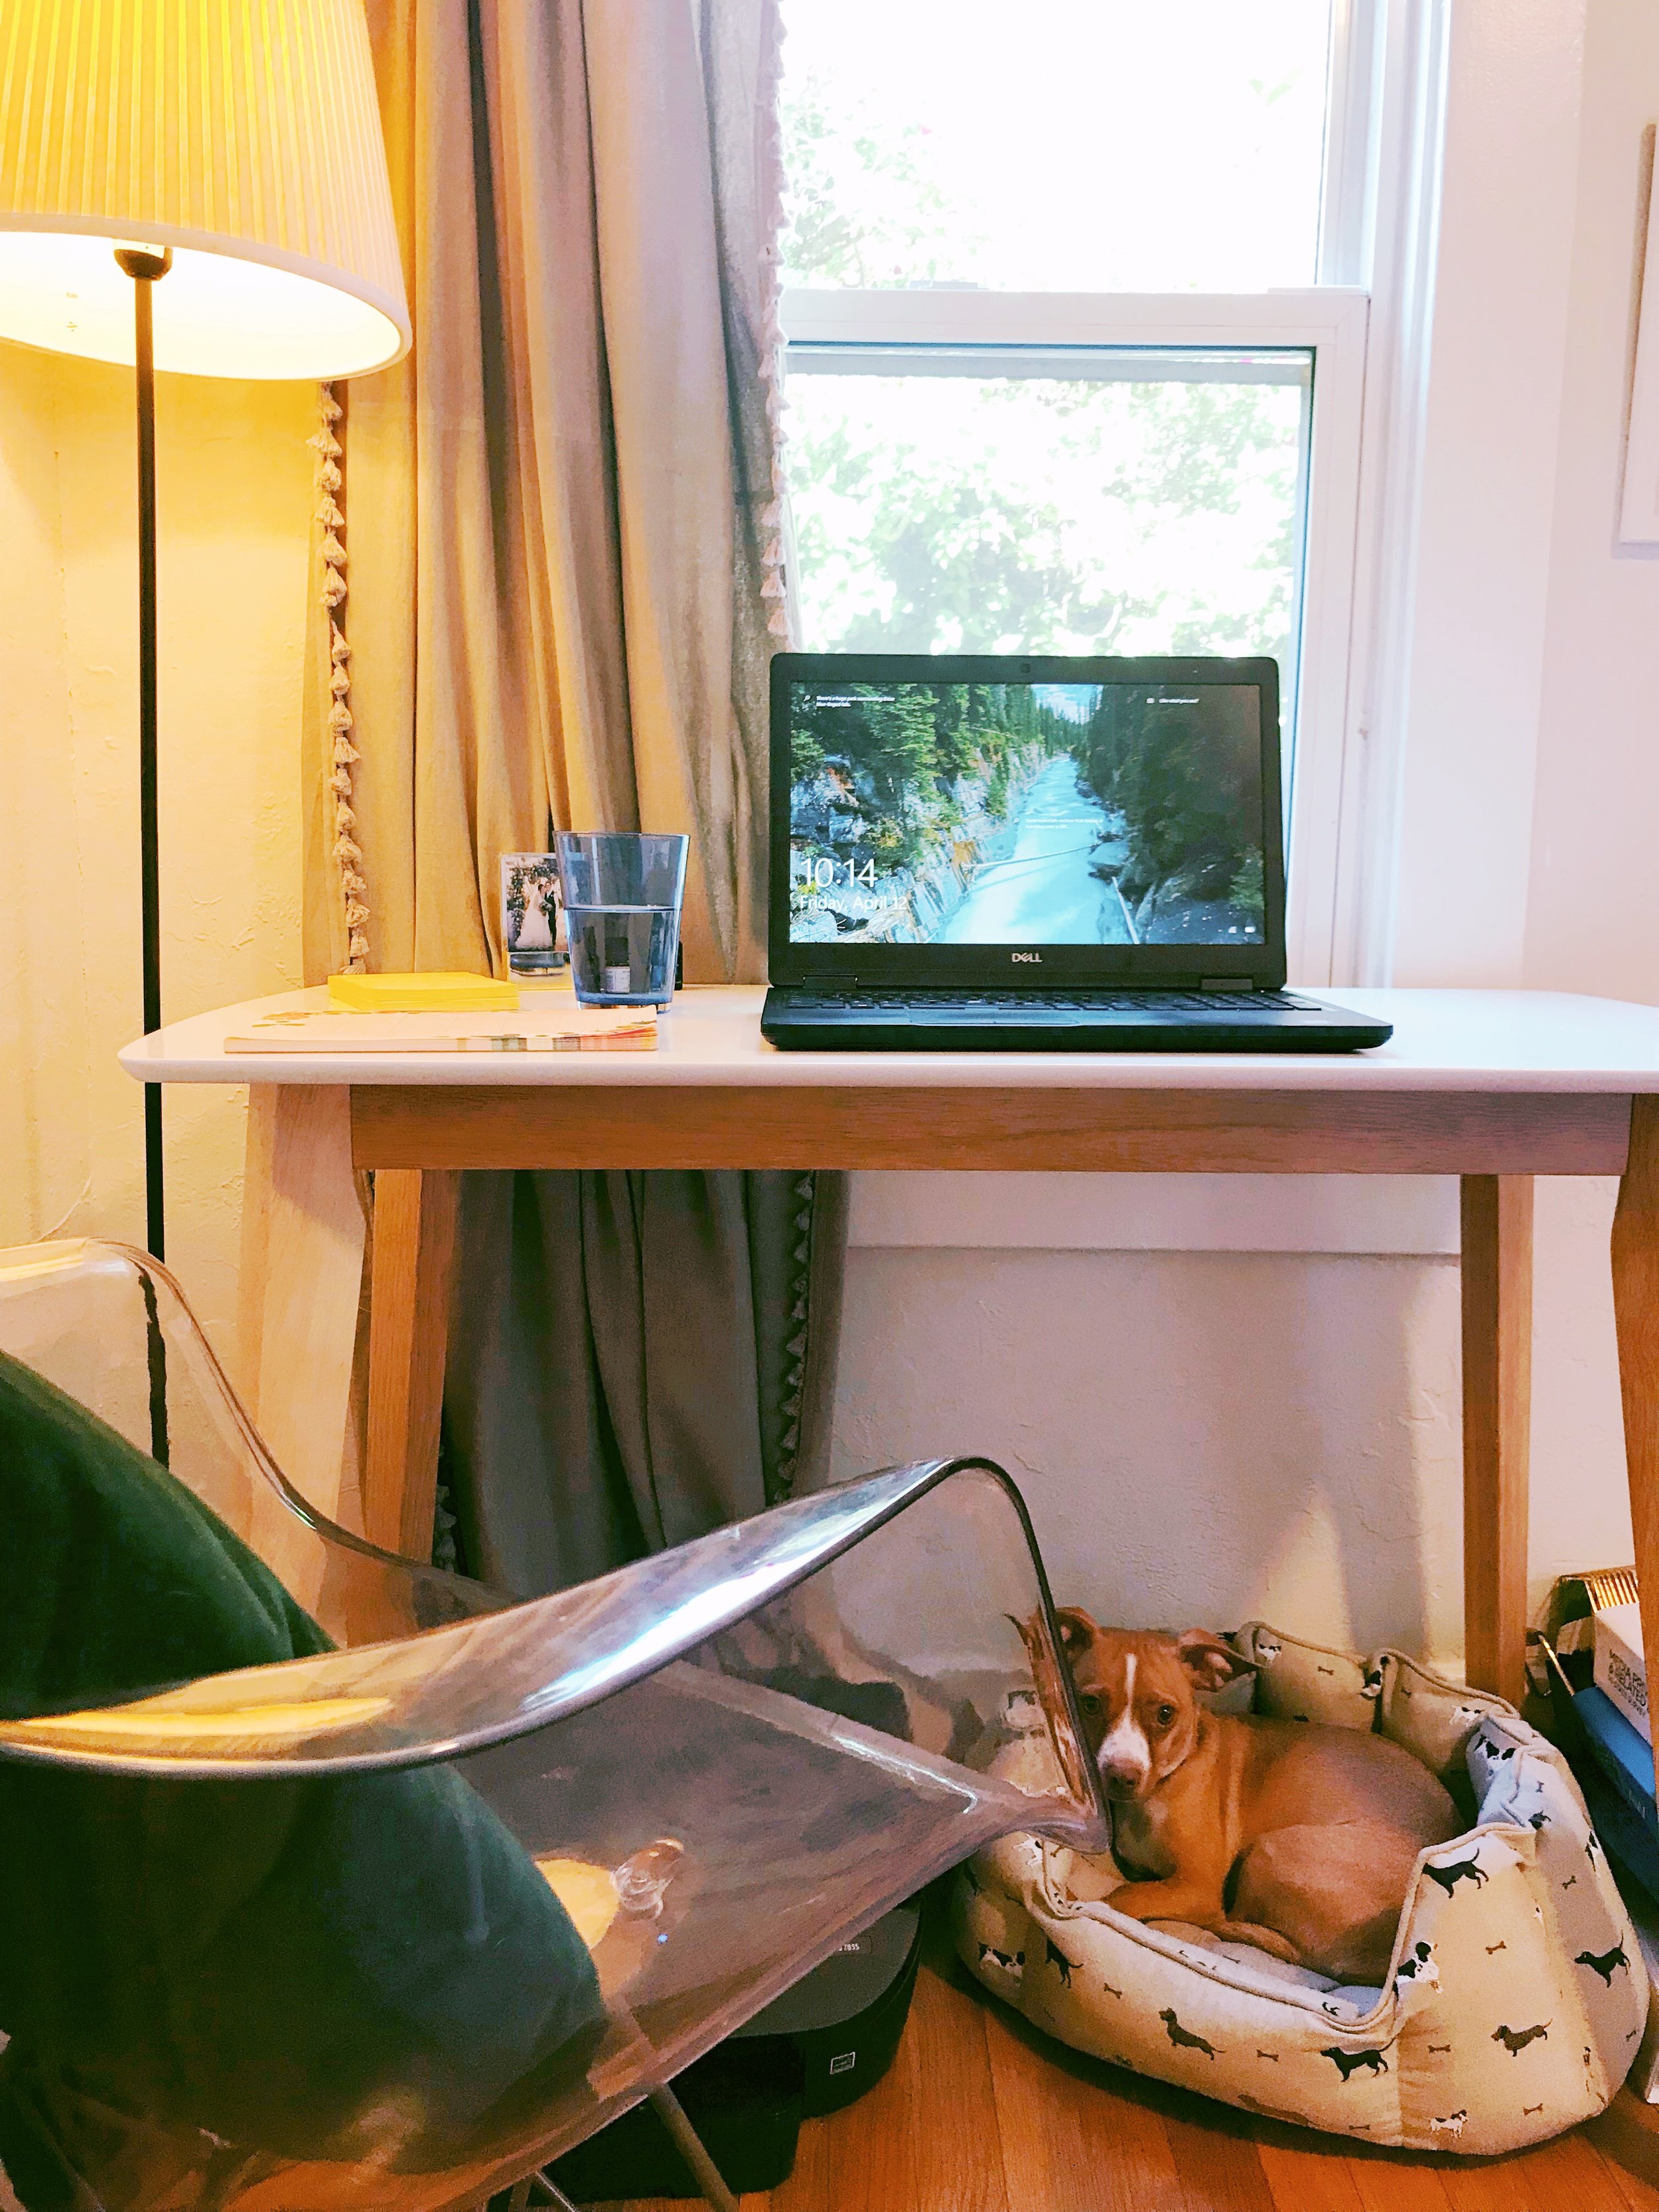
  • Dog-related stuff if you're bringing a dog (so far, we've paid for: vet bills to make sure he's all set for the trip and get him on parasite prevention for parasites/ticks they have in Alaska that we don't have in LA; a doggy raincoat we had to special order (laugh if you want, but it's probably going to rain on this trip a lot and we want him to be comfortable); pet fees where applicable for hotels and home rentals; food in small bags (you can't bring opened bags of dog food over the Canadian border, so we've had to get several 3 or 4 pound bags of food which is not as cost effective); and probably other things I'm forgetting).
  • Car storage if necessary (mine is about $150 for a month if you're curious)
  • Canada parks pass if you go after this year (it's free for 2017 but will cost after that)
  • Car servicing (Grace's car is only a year old but given that we're putting over 7,000 miles on it in the span of a month, she wanted to get it fully serviced before leaving and budgeted a few hundred dollars for that)
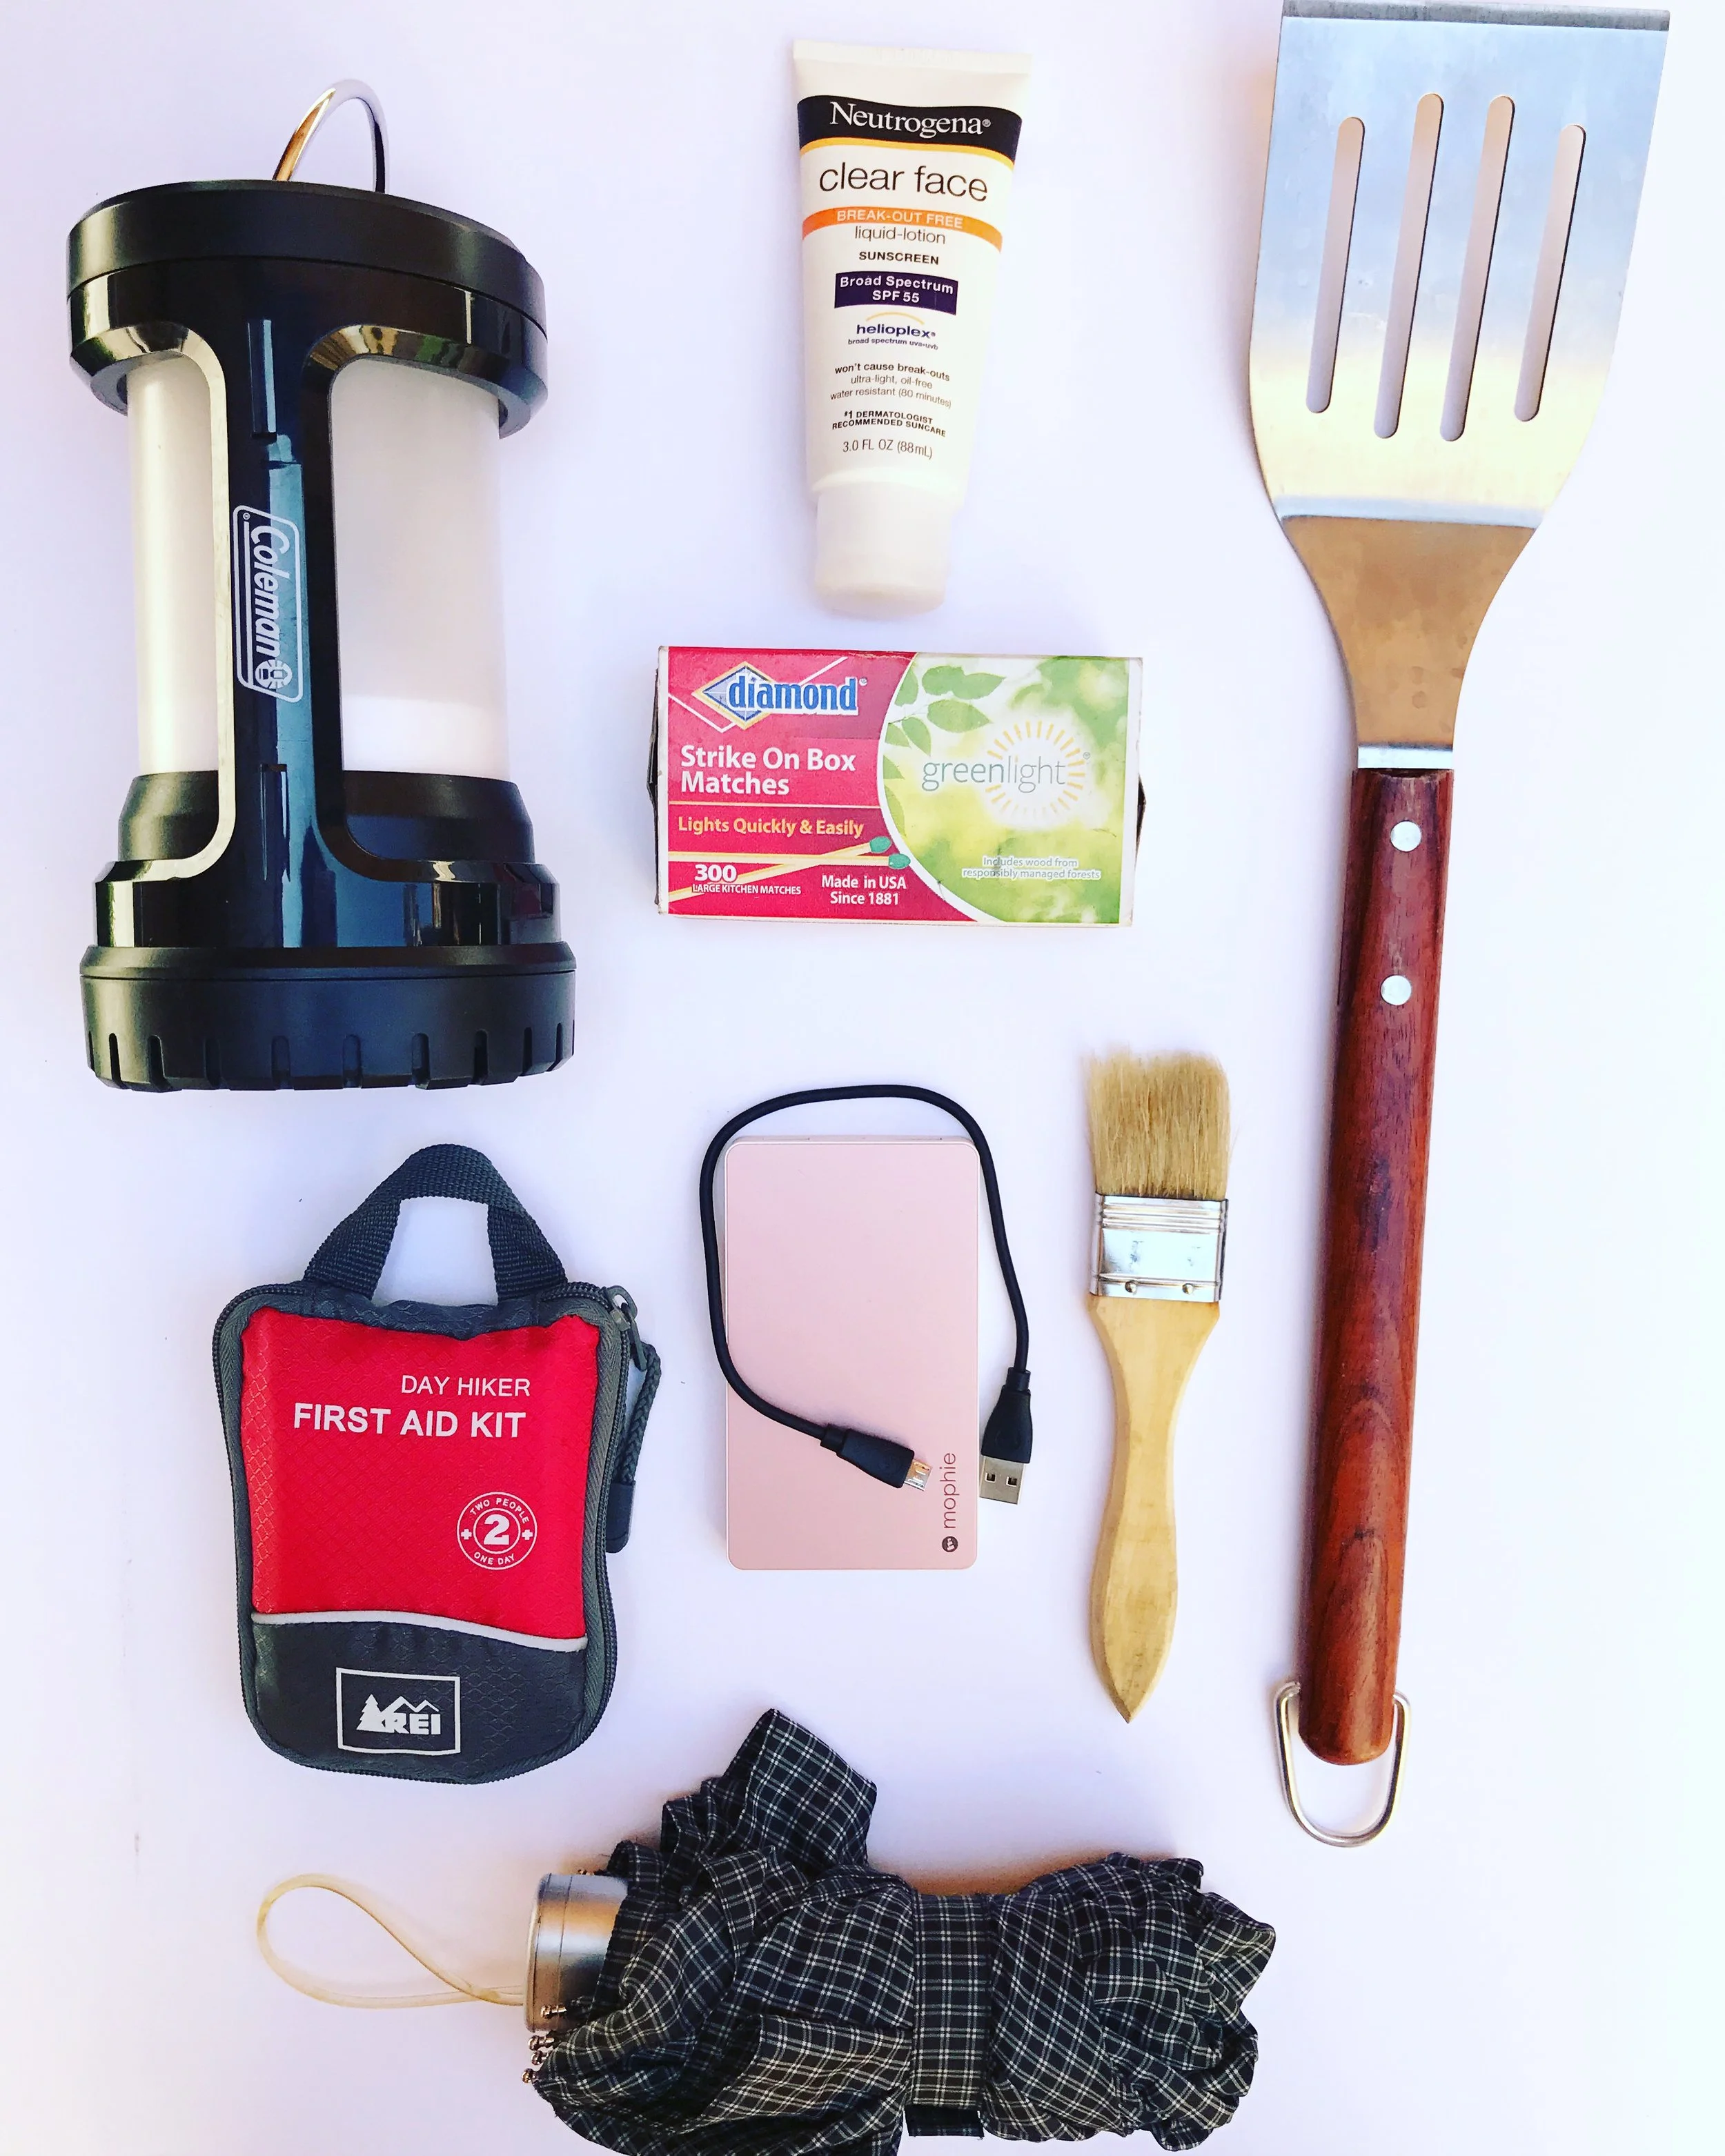
  • Essentials to keep in the car (probably budget $100 for this--sealed emergency gasoline if we run out; non perishables food items to keep in the car; toilet paper/paper towels/trash bags; firewood and gallons of water, etc.)
  • We already have a decent arsenal of camping gear, but if you are doing a camping road trip and need to buy your gear, this is a big area to budget for!
  • Fees due at check-in for hotels, like valet parking, pet fees not included in the rate, resort fees, etc.

How Do I Budget?

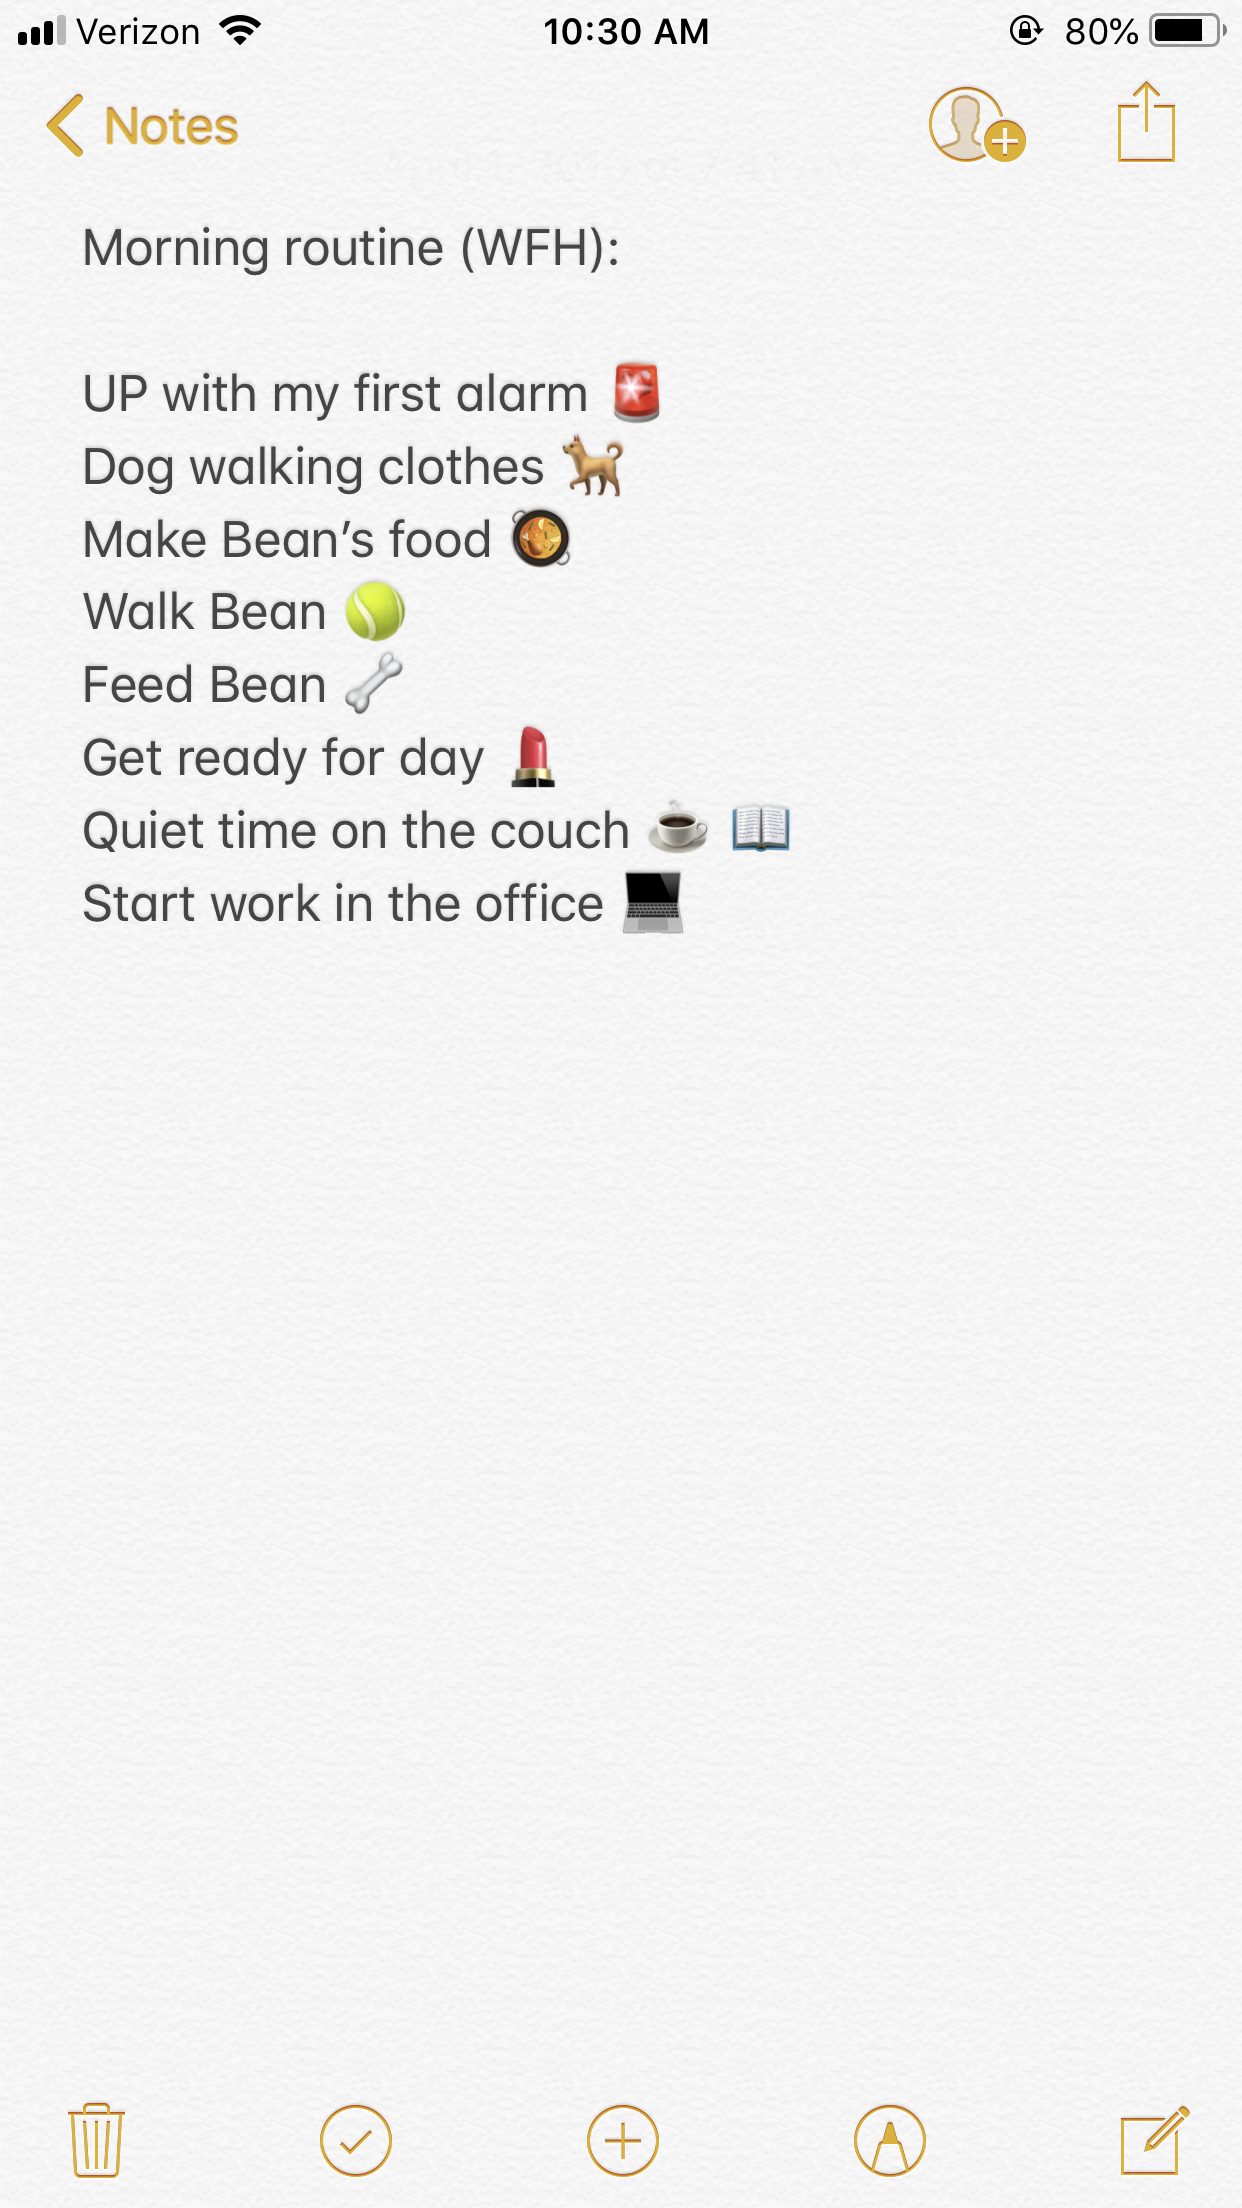
If you're interested in the nitty-gritty, here is how I stay within budget all month long. First, of course, I make my budget. I carve out my fixed expenses (rent, car, insurance, internet bill, etc.) plus the amount per month I want to save for Alaska. Then I see how much I can spend on everything else and write out a detailed budget. Day to day, I use a modified version of the envelope system. (If you're not familiar with the envelope system, it's where you use 100% cash and have an envelope for each category of spending. When the envelope runs out, you're done with that category for the month. It's like budgeting training wheels because you can physically see how much you have left. If you want to learn more, I found this blog post about the envelope system very helpful). That said, I am not okay with carrying around everything with me in cash everywhere I go. I live in a huge city, alone. It just doesn't seem smart. So instead, I use my debit card and sometimes cash, and I have a tiny budget notebook that fits in my wallet with a page for each category and the amount for that month written at the top. With each purchase I make, I add up the new total and write it down. It honestly gives me so much peace knowing I'm totally within budget on each category! It has made me feel like I actually have MORE money and can spend more freely than I did when I was just "winging it" (which I was for a long time). For example, for August I budgeted $100 for Willie-related expenses. So far I've gone to the pet store three times and spent $16, $16, and $45. I think in the past, without a clear-cut budget and knowledge of how much I can responsibly spend, in my mind I would have been thinking, "ugh, I've already gone to the pet store three times for Willie and I feel like I'm constantly spending on him!" But now, I know that I safely set aside $100 for him and I'm well within that number. It sounds so nerdy, but I LOVE budgeting because I have no doubts if I'm ever over-spending. Also, as soon as I get a direct deposit pay check, I transfer my monthly trip savings amount to a separate bank account. Just to be candid, I've been saving about $700 per month this year for the trip and to cover two months of living expenses. I transfer that immediately so that I'm not even tempted to eat into it. I'm proud of how well it's gone!

Here's some truth: budgeting this strictly for this trip has been hard for me and not always fun. I have had to pick Trader Joe's over Whole Foods for groceries almost every time (nothing against good ol' TJ's). But the pinch is SO worth it. There's a Dave Ramsey quote that has been inspiring to me throughout this process: "Live like no one else so that later, you can live like no one else." I feel like with how much I have limited myself (I've spent maybe $100 on clothing in the past YEAR, for example), I am living like no one else around me, and that is hard. But on this trip we will also be living like no one else--able to have a whole carefree month of travel, with savings for when we get back, totally paid for in advance. That has been my motivation and it's really worked. If you have budgeting inspiration and tips, I'd love to hear it! I hope this post has been helpful, and as always, feel free to Contact me with questions.

In LA to Alaska Road Trip, How-To Tags budgeting, road trips
2 Comments

Tips for Visiting Yosemite with a Dog

August 14, 2017 Elizabeth Baldridge
Dog_Yosemite

One of my favorite things we ever did with Casper was take him to Yosemite. I described the trip a little bit already in my post about my Top 5 Favorite Road Trips, but I get questions all the time about going to Yosemite and have been wanting to write about it a little more in depth. Also, people often assume that you can't take dogs there. You totally can! It just takes a little more planning.

Side note: this post is about bringing dogs to Yosemite in general, but it's written from the experience of bringing a dog to Yosemite who does not like other dogs. That was a big part of our planning--making sure we structured our visit so we'd have plenty of space to roam and not have Casper run into other pups on the trails. The recommendations I give below are tailored to that. If you are in a similar situation and want more detail about how to avoid other dogs at Yosemite, feel free to Contact me :)

Dog_Walk_Yosemite

Every now and then I talk to someone who hasn't heard of Yosemite. In case you're in that boat, it's a national park. One of the gems of America. It is located in Eastern California in the Sierra Nevada mountain range, about 5 hours north and slightly east of LA and about 3 hours east and slightly south of San Francisco. Yosemite was one of the first national parks created (only Yellowstone is older) and was really central to the development of the whole concept of having national parks in this country. It is pristine, inspiring, stunningly beautiful, and one of the most amazing and special places I have ever been. I highly recommend it to anyone, as there is something for everyone there. When we went we saw families, solo travelers, people with pets, people using wheelchairs, elderly people, little kids, and everything in between. It is truly amazing! It's one of the things that makes me proud of the United States. When Grace and I went we kept saying "this is like Disneyland but for nature." So incredible.

On the topic of pet-friendly Yosemite trips, I guess I'll start out by explaining what you can't do with a dog. The main thing is that you can't go on any unpaved trails. I'm sure some of those trails are really awesome and worthwhile. But I can tell you from firsthand experience that there was plenty to do staying just on the paved trails, and I don't feel like I missed any iconic Yosemite views or experiences by being limited with a dog. Yes, maybe if you're going to Yosemite for a weeklong trip with your whole extended family, it might be tedious to be restricted to the paved trails. But for a two-day trip like ours, there was more in the park than we could ever do in that time and keeping to the paved portions didn't bother us one bit. The Yosemite website has a great page describing the areas where you can go--when they say "paved," that includes portions of the trails that are wood-planked, as well as bridges.

Look at these responsible Yosemite visitors, staying on the paved pathways.

Look at these responsible Yosemite visitors, staying on the paved pathways.

You also cannot take the shuttles around Yosemite if you have a dog (I'm assuming this would not apply to service animals, but I don't have any personal experience with that). Just to give you a picture, Yosemite is HUGE and you could never walk it all in a day or two. You have to get transported between all of the different sights to see and trails to walk. There are two primary options for getting around Yosemite: driving your own car and stopping at each location/trailhead or parking your car at a central location and then taking the shuttles around the park. I think that most people elect to do the latter because it is less stressful (you don't have to look for parking spots which can be hard to find). But that's not an option with a dog, so that's something to be aware of.

Other than keeping your dog on a leash and using doggy poop bags, the two things I describe above are really the only dog-related rules for Yosemite. That said, I think they are pretty strict and you can get fined for violating them. But besides for keeping those in mind, there is SO much you can do with your pup in the park, and it's such a cool experience for them and you.

If you watched Grace's many Instagram stories of trying to get Casper out of bed or have read my other posts about him, you know that he was not a fan of exercise or long walks. He was an old boy and had a hard life before we adopted him--can you blame him for just wanting to kick back and relax?! But when we went to Yosemite, it was a totally different story, and it was amazing to see. In one morning, he walked 4 miles without a complaint. SO wild for him! I think it was a combination of the cooler temperatures (in the 50s and 60s while we were there), the interesting new sights and smells, and the excitement of the adventure and being included with his moms that kept his energy and mood high. It made me so happy to see him so full of life and energetic. I felt the same way in such a beautiful place!

Casper_and_Mama

To get into the nitty-gritty, here is what I recommend if you're traveling with a dog for a couple of days to Yosemite:

First, try to travel in spring or fall. Winter is beautiful, I've heard, but the areas of the park that are open are a lot more limited because of the weather. Summer is SO crowded. We went in March, and it was absolutely perfect. A few roads and trails were still closed from winter, but it was mostly areas that we couldn't take a dog anyway. The crowds were totally manageable. And the weather was sublime. One other benefit to going in spring over fall--the ice from winter is starting to melt, and as a result all of the waterfalls are flowing in full force.

Second, embrace the 5am wakeup call. Seriously. It was my dream to see sunrise over the park, and it was SO worth the early wakeup. A really great thing about Yosemite is that it doesn't close overnight. It is open 24 hours, so take advantage of that! You can get there as early as you want, and I recommend going as soon as it's light outside. We had no line going into the park (there is a ranger station where you have to check in and pay the fee--about $25 for a weeklong pass, I think), but on the way out later that day, we passed about a MILE of cars waiting to get in. The early bird truly gets the worm at Yosemite.

Getting up early and traveling in the spring rather than summer allowed us to have such a peaceful experience--plus, we got some amazing photos of us surrounded by zero crowds in some of the most iconic Yosemite locations!

Tunnel_View_With_A_Dog
Yosemite_No_Crowds

Third, prioritize what you want to see. During part of our time in Yosemite, we just kind of drove around and pulled over to the side of the road when we saw an area that we wanted to explore, but that was only after we had already checked off all of our must-see items. My favorite areas we saw (these are all dog-friendly) were:

Tunnel View. It gets its name from the tunnel you drive through right before coming to it. This isn't a hike-in spot; it's right on the side of the road. This is the most iconic, postcard picture/perfect spot in Yosemite--see the waterfall in the ba…

Tunnel View. It gets its name from the tunnel you drive through right before coming to it. This isn't a hike-in spot; it's right on the side of the road. This is the most iconic, postcard picture/perfect spot in Yosemite--see the waterfall in the back righthand side of the photo?! It's just unreal. 

Bridal Veil Falls. This is probably the largest/most impressive waterfall in Yosemite that you can get close to with dog. You can feel the mist on your face when you walk up to it! There is a short hike in to get to it--more like a pleasant stroll, …

Bridal Veil Falls. This is probably the largest/most impressive waterfall in Yosemite that you can get close to with dog. You can feel the mist on your face when you walk up to it! There is a short hike in to get to it--more like a pleasant stroll, really (it's paved).

This photo and the photo below are just of a little creek that you pass by on the "hike" in to see Bridal Veil Falls. Everything in Yosemite is beautiful--not just the destination at the end of the trail.

This photo and the photo below are just of a little creek that you pass by on the "hike" in to see Bridal Veil Falls. Everything in Yosemite is beautiful--not just the destination at the end of the trail.

Yosemite_Creek_Bridal_Veil_Falls
This picture as well as the next two below are from the Lower Yosemite Fall Trail (I believe it's also known as the Valley Floor Walk).

This picture as well as the next two below are from the Lower Yosemite Fall Trail (I believe it's also known as the Valley Floor Walk).

Yep, that's snow still on the ground in March!

Yep, that's snow still on the ground in March!

Yosemite_Moss
Mirror Lake. This spot is probably tied for first with Tunnel View as the most beautiful place I've seen in Yosemite. It's so peaceful and, for lack of a better word, reflective. Can you spot tiny Grace and Casper on the left side of the photo below?

Mirror Lake. This spot is probably tied for first with Tunnel View as the most beautiful place I've seen in Yosemite. It's so peaceful and, for lack of a better word, reflective. Can you spot tiny Grace and Casper on the left side of the photo below?

Mirror_Lake_Dog
This and the two photos below were taken on the Cook's Meadow Loop, an easy stroll through the meadows of Yosemite with beautiful views of mountains and waterfalls in the distance.

This and the two photos below were taken on the Cook's Meadow Loop, an easy stroll through the meadows of Yosemite with beautiful views of mountains and waterfalls in the distance.

Yosemite_Meadows
Casper_Cooks_Meadow

The truth is, there aren't any ugly places in Yosemite! Even just pulling over to the side of the road without any marked "attraction" or trailhead, we would get photos like this:

Yosemite_Us

It's a magical place. For anyone who's curious, we stayed in this dog friendly Airbnb located about 20 minutes outside the park. There are lodging options within the park, too, but they tend to be more expensive and were all booked by the time we planned our trip (we planned this only a few days in advance--spontaneous travel to Yosemite is totally possible, but you'll probably need to stay outside the park gates like we did).

If you have any dog-friendly tips and tricks for Yosemite that I haven't mentioned here, I'd love to hear them! I can't wait until we can go back with Willie.


In How-To, Getaways Tags Yosemite, Travel, Travel with Dogs, Tips
12 Comments

My Favorite Camping Meals

July 28, 2017 Elizabeth Baldridge
Camping_Spread

I have been looking forward to writing this post for a while, because it delves into one of my very favorite aspects of camping: food! Me cooking for Grace has been a big part of our relationship from the beginning (she cooked for me once back in 2014 . . . I swear it tasted fine but we still laugh about how it was kind of a disaster). I cook at least some of Grace's meals every week, and I cook for myself about 90-95% of my meals. When we camp, I see it as a special and fun challenge to cook something different from what I normally would at home. 

One of the first things I think about when booking a getaway is what type of cooking options will be available. They range from: no fire or grill allowed--must prep everything in advance; fire ring provided; propane or charcoal grill provided; or full kitchen (like when we rent cabins or other homes). The menu I decide on will be strongly influenced by what cooking setup I will be able to access.

I'm mostly going to talk about cooking with no access to fire/heat, cooking over a fire, and grilling in this post. Though I love staying in cabins and cooking fun meals there, it's not really "camping food" if you have a full kitchen! Below are some of my favorite meals I have made while camping; all the photos were taken on camping trips over the past couple of years!

Seafood_Packets

The photo above is one of my favorite camping meals that I made earlier this year when Grace and I camped in a treehouse in Ojai. Foil packets in general are great for either cooking over a fire or grilling, as they reduce some of the unevenness that can come from cooking using flames. In this recipe, I simply took fresh shrimp, scallops, and mussels (be careful that these are live when you cook them--keep them super cold right up until cooking) and threw in some summer squash, corn on the cob, tomatoes, lemon and butter. I sealed up the packets and put them on the grill for about 20 or 30 minutes over medium heat until the seafood was cooked thoroughly and the mussel shells opened up. Grace and I were in heaven eating these. I paired it with some baked potatoes, also cooked over the grill, and champagne because why not. This one definitely stands out as one of my favorite camping meals ever. The only tricky part here is ensuring that your seafood stays fresh, but if you have a good cooler and you cook this the first night of the camping trip, it should be fine. Otherwise, this is so EASY! We loved it.

Calzone_Camping

Excuse the poor quality photo, but it's the only one I have of this next camping favorite--pizza roll-ups cooked over the fire in foil. This particular camping trip, all we had was a few rocks to make a fire ring; no grate or anything to create a cooking surface. So for dinner, I spread out some foil and then some pizza dough. I topped it with sauce, cheese (vegan or non works just as well), and thinly sliced squashes and red onion. Then I rolled up the pizza into a log, covered it in foil, and just placed it right on the fire (carefully!).  I left it for about 15 minutes and then unwrapped the foil and sliced it width-wise into little calzone-type bites! So good and simple. And, if you have more people, they can all customize their own.

Veggie_Mac_N_Cheese_Camping

This next camping meal is great for when you've been camping for several days and your cooler is no longer cold. The photo above is Mac N Cheese from the box, mixed with some simmered peas and onions. That's it! It is simple but comforting for a chilly night around a fire. I like Annie's and Earth Balance brands boxed Mac N Cheese. I just added a little less water than the pasta normally calls for and cooked the whole thing in one pot (my deep dish cast iron skillet--a staple on camping trips). The Mac N Cheese in the photo was cooked over an open fire, so it took a little longer to boil, but it was still pretty much as easy as it gets. I simmered the onions and peas in the same water as the pasta, and once all the water cooked off, I added in the packet of "cheese" powder and some butter. Maybe not the most nutritious meal, but a great option for day 3 or 4 of a camping trip.

Tuna_Steaks_Camping
Tuna_Camping_Dinner

These two photos show a before and after of a perfect summery camping meal. Using my cast iron skillet, I seared a couple of tuna steaks seasoned with some flaky Maldon salt and ground pepper. Beside the skillet over the fire I roasted some foil packets filled with chopped zucchini and summer tomatoes. I took everything off the fire and plated it, and it turned out so good! This is definitely something to cook the first night that you buy the tuna steaks--not a good idea to leave those in the cooler for too long. This meal was the first night of my 2015 California road trip with Grace, and it is still a memorable one.

Campfire_Nachos
Stuffed_Avocados

I wrote a little bit about the meal pictured above in my Big Bear camping trip recap--I made it this past spring over a fire Grace built for me. It's one of the easiest campfire meals you can make; I'm surprised I hadn't thought of it sooner! All I did was roast some tortilla chips, cheese, and black beans in a cast iron skillet over a fire. Once it got good and melty, I took it off the fire, separated the chips between two plates, and topped with all the fixin's! As an appetizer, we ate avocados stuffed with baby shrimp salad. This was a truly delectable meal, and it came together in about 15 minutes (in addition to the time it took to build the fire).

No_Cook_Tacos

In this blurry photo Grace is holding some no-cook tacos, a meal I made us on a trip where fire restrictions prohibited us from cooking over a flame. My toppings of choice were black beans, avocado, tomato, lime juice, and fresh corn cut off the cob. I love the sweetness and crunch of fresh corn. In advance, I whipped together some vegan mayo and hot sauce in a plastic bag, and at the camp site I snipped the tip off the bag and squeezed the aioli over the tacos. Though everything was room temperature, they were still delicious and filling.

In addition to these favorites that are more planned out, I never write off a good sandwich spread or simple picnic snack. Sometimes, you can't make a fire, or you don't have a lot of ingredients left in the cooler. Here are a few "simple favorites":

Eggs_Kettle

Some eggs over a fire and a kettle full of water for making coffee or tea. I tend to keep breakfasts simple when camping.

Camping_Oatmeal

Another breakfast staple: oatmeal with some brown sugar and blueberries thrown on top.

Caprese_Pasta_Salad

A delicious, made-in-advance caprese pasta salad is perfect for a snack on the side of the road.

Car_Sandwich_Spread

This setup might look messy, but it didn't matter when we were all hungry! I made this sandwich spread for a group of friends on a trip earlier this month. I set out sliced bread, deli slices of cheese and meats, homemade tuna salad, hummus, pickle slices, arugula, sliced avocado, all the condiments, and chips, watermelon slices, and cookies on the side. This was a no-cook lunch option that everyone could fix to their liking. You might not be able to tell from the photo, but this is in the back of Grace's car--we just opened the back hatch and I set everything out! Easy.

One last category I don't have many photos of: dessert. Not to make her sound demanding (because she's not, at all), but I will say that pretty much every night, Grace goes, "so what's my sweet treat?" Haha! She has a major sweet tooth that I never want to overlook when we are camping. The reason I don't have a lot of photos of camping desserts, though, is because it's usually dark by the time we eat them! That, or I'm in a food coma from our delicious dinner and don't remember to take a photo. Here's one favorite, though--sliced peaches with cinnamon and butter, baked over the fire in a foil packet:

Roasted_Peaches

This would also be great with apple. Most of the time, we just roast marshmallows (Trader Joe's are the BEST and they happen to be vegan) and eat them with some sort of chocolate. Another trick I recently learned is that if we cooked dinner on a grill, I'll place a layer of tin foil across the grill while the heat recedes, plop some slices of store-bought cookie dough down on it, close the grill and let them cook while we eat dinner. Such a yummy treat for after dark, especially if the air is cool and the cookies are warm :)

I'm feeling hungry from writing this post! Time to brainstorm a menu for our next trip--we leave a week from today!

In How-To Tags food, camping food, campfires, grilling
Comment
Older Posts →
Our Family

A Los Angeles-Based Queer Lifestyle & Local Travel Blog

Hi, I'm Elizabeth! In the pages of this blog, you can find inspiration for your next road trip & ideas for infusing that "fresh from a getaway" state of mind into the everyday. Take a look around & enjoy!

Subscribe

Receive new posts via email

You'll only receive emails from me, and only when I write a new post

Thank you!

Categories

  • All About Casper
  • Bean Baldridge
  • Celebrations
  • Getaways
  • Goals
  • Honeymooning in Hawaii
  • How-To
  • Kitchen + Bar
  • LA to Alaska Road Trip
  • Marriage
  • Naming the Good Stuff
  • Our Little Bungalow
  • Our Wedding
  • Personal
  • Road Trip Dreaming
  • Willie Nelson Baldridge
Follow
We’re back in Grace’s hometown for the first time in three and a half years! Just as charming and cozy as we left it 🥰🇧🇪
Vacation moms on holiday 🦢🦢
Since I grew up a few hours inland, sometimes I forget that I live near the beach now and then I remember and have a beach day and it makes me SO HAPPY! 🏄🏻‍♀️🏖🌊
I can’t believe it was just a year ago that we were getting home from our incredible honeymoon. A year later to the day, we’re returning from a short trip to NC and leaving again in just about 10 days for our first overseas trip since our
Our anniversary present to each other was meet and greet VIP Carly Rae tickets and it was everything and more 😭 We got to tell her what her music has meant to us and she wished us a happy anni-so, our lives are now complete. We love you Carly 💓💓💓
Celebrated one year of marriage this past weekend at the most charming inn I have ever seen @lavenderinn 😍🥂 Ojai is our happy place

© Copyright 2017-2021 Have Dog Will Drive

Blog RSS